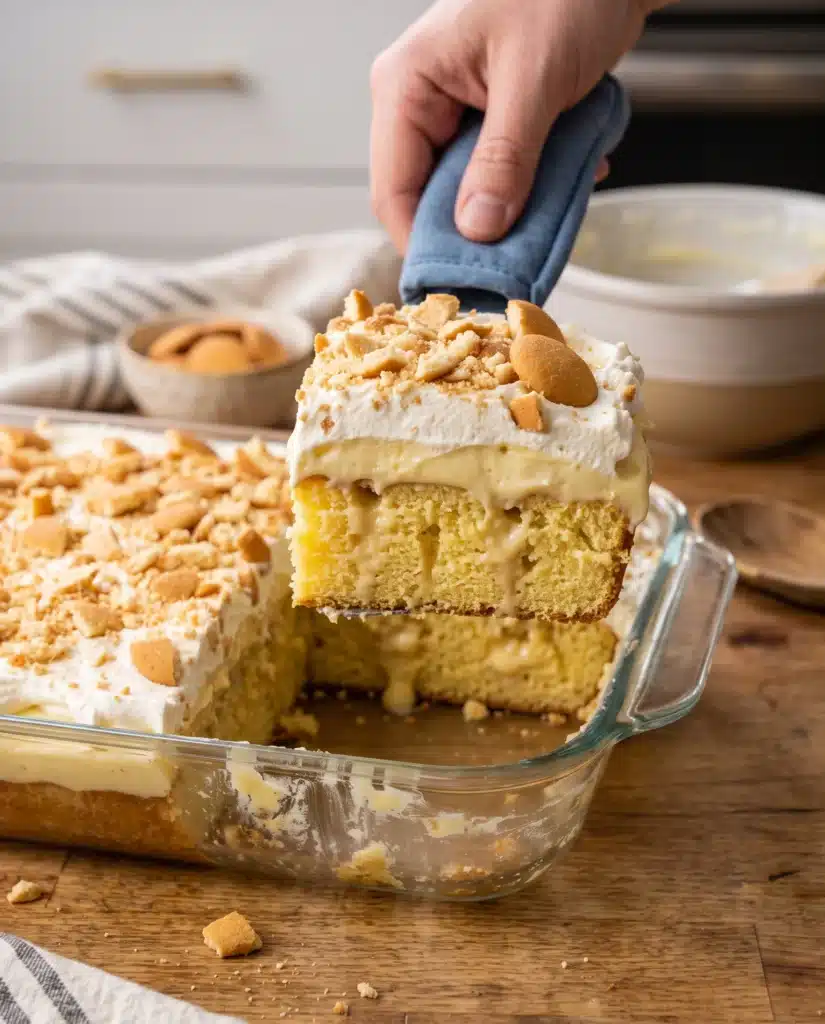
When it comes to dessert, combining the nostalgic flavors of a classic Southern favorite with a tender, moist crumb creates an unforgettable sweet treat. A banana pudding poke cake brings together a soft yellow cake base, a rich and creamy pudding filling studded with fresh fruit, and a light, airy whipped topping. The crowning touch of crushed vanilla wafers provides a satisfying crunch that contrasts beautifully with the soft layers underneath.
This dessert takes the familiar components of traditional banana pudding and transforms them into a structured, sliceable format that is incredibly easy to serve. The technique of poking holes into the freshly baked cake allows the velvety pudding to seep down into the crumb, infusing every single bite with moisture and flavor.
Because it requires several hours of chilling time to set properly, this is an excellent choice for hosts looking to prepare their menu in advance. The flavors meld together as it rests in the refrigerator, ensuring that the cake becomes even more flavorful the next day. Whether you are planning a summer cookout, a holiday gathering, or a casual weekend family dinner, this dessert offers a comforting, familiar flavor profile that appeals to a wide variety of palates.
Why You’ll Love This Recipe
- Make-Ahead Convenience: This dessert requires adequate time to chill in the refrigerator, making it an excellent choice to prepare a day before your event. The resting time actually improves the texture and allows the flavors to meld.
- Simple Preparation: Using a few smartly chosen pantry staples, including a boxed cake mix and instant pudding, significantly cuts down on active preparation time while still yielding a highly impressive result.
- Accessible Ingredients: You will not need to visit a specialty grocery store. Every component is readily available in the baking and dairy aisles of standard supermarkets.
- Appealing Texture Contrast: The soft cake, creamy pudding filling, fluffy whipped topping, and crisp vanilla wafers provide a satisfying variety of textures in every forkful.
- Family-Friendly Flavor: The mild, sweet combination of vanilla and ripe fruit is universally beloved by children and adults alike, ensuring an empty baking dish at the end of the night.
Ingredients You’ll Need
For the Cake
- 1 box (15.25 ounces) yellow cake mix
- 1 cup water
- 1/2 cup vegetable oil
- 3 large eggs
For the Filling
- 2 boxes (3.4 ounces each) instant vanilla pudding mix
- 3 cups cold whole milk
- 2 large, ripe bananas
For the Topping
- 1 container (8 ounces) whipped topping, thawed
For the Garnish
- 1 cup crushed vanilla wafers
Ingredient Roles
The yellow cake mix serves as a sturdy yet tender foundation, absorbing the moisture of the filling without completely falling apart. Instant vanilla pudding mix combined with cold whole milk creates a thick, custard-like consistency that flows into the cake easily before setting firmly. Ripe bananas folded directly into the pudding provide a fresh, authentic fruit flavor that extracts cannot replicate. Finally, the whipped topping seals the cake, keeping the layers underneath moist, while the crushed vanilla wafers add a necessary structural crunch to the top.
Ingredient Notes and Substitutions
If you need to make adjustments based on what you have in your pantry, several practical substitutions will work well without compromising the final dessert.
- Cake Mix Variations: While yellow cake mix offers a classic buttery flavor, a white cake mix or a French vanilla mix will also work beautifully. For an even stronger flavor profile, you could use a banana-flavored cake mix, though this will significantly increase the overall sweetness of the dish.
- Pudding Options: Instant vanilla pudding is the standard, but instant banana cream pudding will amplify the fruit notes if you prefer a stronger, more concentrated flavor. Ensure you purchase instant pudding, not the cook-and-serve variety, as the preparation steps and setting times are completely different.
- Milk Alternatives: Whole milk provides the best creamy texture and sets the pudding firmly. If you use a lower fat milk, the pudding may be slightly thinner. If using a non-dairy alternative like oat milk or almond milk, you must use less liquid (about 2 cups total) because plant-based milks often prevent instant pudding from setting properly.
- Topping Choices: If you prefer not to use store-bought whipped topping, you can whip two cups of heavy whipping cream with a quarter cup of powdered sugar and a teaspoon of vanilla extract until stiff peaks form.
- Garnish: Standard vanilla wafers are traditional, but crushed graham crackers, shortbread cookies, or even a light dusting of toasted coconut can provide a similar crunch and visual appeal.
Equipment Needed
- 9×13-inch baking dish: Glass or ceramic works best for an even bake and allows you to see the layers on the sides.
- Large mixing bowls: You will need one for the cake batter and a separate one for the pudding mixture.
- Whisk or electric hand mixer: For smoothly blending the cake batter and whisking the instant pudding.
- Wooden spoon: The round handle of a standard wooden spoon is the ideal size for poking holes into the cake.
- Silicone spatula: Essential for folding the sliced fruit into the pudding and spreading the whipped topping evenly across the surface.
How to Make the Recipe
- Prepare the oven and pan: Preheat your oven to 350°F (175°C). Lightly coat your 9×13-inch baking dish with non-stick cooking spray to prevent the cake from sticking to the bottom and sides.
- Mix the cake batter: In a large mixing bowl, combine the yellow cake mix, water, vegetable oil, and large eggs. Use an electric hand mixer on medium speed to beat the ingredients together for about two minutes, scraping down the sides of the bowl with a silicone spatula to ensure no dry pockets remain. The batter should be smooth and thick.
- Bake the cake: Pour the batter evenly into the prepared baking dish. Bake in the preheated oven for 25 to 30 minutes. You will know the cake is done when the edges pull away slightly from the sides of the pan and a toothpick inserted into the center comes out clean.
- Cool and poke the cake: Remove the cake from the oven and allow it to cool at room temperature for about 15 minutes. It should still be warm, but not piping hot. Take the round handle of a wooden spoon and poke holes all over the surface of the cake, spacing them about one inch apart. Press down about halfway into the cake; do not poke completely to the bottom of the dish.
- Prepare the bananas: Peel the ripe bananas and slice them into thin, even rounds, about a quarter-inch thick.
- Whisk the pudding: In a separate large bowl, combine the two boxes of instant vanilla pudding mix with the cold whole milk. Whisk vigorously for about two minutes until the mixture begins to thicken slightly.
- Fold in the fruit: Immediately fold the sliced bananas into the thickening pudding mixture using a silicone spatula.
- Fill the cake: Pour the pudding and fruit mixture directly over the warm, poked cake. Use your spatula to gently spread the pudding, pressing it down into the holes so they fill completely. Ensure the top is smooth and even.
- Chill to set: Place the baking dish into the refrigerator for at least two hours to allow the pudding to set completely and cool the cake.
- Add the topping: Once the cake is completely cool and the pudding is firm, spread the thawed whipped topping in a thick, even layer over the entire surface.
- Garnish and serve: Just before serving, crush the vanilla wafers into coarse pieces. Sprinkle them generously over the whipped topping. Slice into squares and serve chilled.
Tips for the Best Results
- Poking the right depth: When using the handle of your wooden spoon, aim to go about halfway to three-quarters of the way down into the cake crumb. If you push all the way to the glass bottom, the pudding will pool underneath the cake, making the bottom layer soggy rather than integrating with the crumb.
- Time the pudding properly: Mix the pudding and fold in the fruit right before you pour it over the cake. Instant pudding sets rapidly. If you mix it and let it sit on the counter for ten minutes, it will be too thick to easily seep into the holes.
- Temperature matters: The milk used for the pudding must be very cold for the instant mix to activate and thicken properly. Conversely, ensure your whipped topping is fully thawed in the refrigerator overnight so it spreads smoothly without tearing the pudding layer.
- Fold gently: When incorporating the sliced fruit into the pudding, use a gentle folding motion with a spatula rather than stirring aggressively. This keeps the slices intact and prevents them from turning into mush.
- Delay the garnish: Vanilla wafers absorb moisture very quickly. To maintain their signature crunch, wait to sprinkle the crushed cookies over the cake until right before you plan to slice and serve.
Common Mistakes to Avoid
- Overbaking the cake base: A dry cake will not absorb the pudding as effectively. Keep a close eye on your oven and remove the baking dish as soon as a toothpick comes out clean.
- Using cook-and-serve pudding: This recipe relies strictly on instant pudding mix. Cook-and-serve pudding requires boiling and a completely different cooling process, which will not work with the timing and assembly of this dish.
- Poking holes too close together: If you poke too many holes or space them closer than an inch apart, the structural integrity of the cake will collapse, turning the dessert into a messy trifle rather than a sliceable cake.
- Spreading topping on a warm cake: If you rush the initial chilling step and attempt to spread the whipped topping over a cake that is still warm, the topping will melt, separate, and slide off the pudding layer.
Serving Suggestions
This dessert is rich, sweet, and creamy, making it a stellar conclusion to a savory, hearty meal. It pairs exceptionally well with classic barbecue dishes, roasted chicken, or smoked brisket, providing a cool and refreshing contrast to heavy, smoky flavors.
Because it is served chilled, it is a staple for warm-weather gatherings, picnics, and potlucks. Pair a slice with a cup of hot black coffee to balance the sweetness, or serve it alongside a tall glass of unsweetened iced tea with a wedge of lemon. If you are serving it at a party, consider offering extra whole vanilla wafers on the side so guests can scoop up any extra pudding that escapes onto their plates.
Storage and Reheating
Proper storage is essential to maintain the texture of both the cake crumb and the dairy layers.
- Refrigerating: Cover the baking dish tightly with a fitted lid, plastic wrap, or aluminum foil. Ensure the wrap does not press heavily onto the whipped topping. Store in the refrigerator for up to three days. Note that after the first day, the fresh fruit inside may begin to soften and darken slightly, and the wafer garnish will become soft. This does not affect the safety of the dessert, only the visual appeal and texture.
- Freezing: Freezing is not recommended for this dessert. When thawed, the pudding will release water and separate, the fresh fruit will turn entirely black and mushy, and the cake base will become unpleasantly soggy.
- Reheating: This dish contains dairy and fresh fruit, and is designed to be eaten cold. Do not attempt to heat or warm the cake before serving.
Frequently Asked Questions
Can I make this recipe ahead of time?
Yes, this is an ideal make-ahead dessert. You can prepare the cake, add the pudding and fruit, and spread the whipped topping up to 24 hours in advance. Keep it tightly covered in the refrigerator. Wait to add the crushed wafers until you are ready to serve to keep them crisp.
How do I prevent the bananas from turning brown?
Because the fruit slices are fully submerged in the pudding and protected from oxygen by the whipped topping layer, they will naturally resist browning for the first day or two. If you are highly concerned about discoloration, you can toss the slices very lightly in a small amount of lemon juice before folding them into the pudding, though this will add a slight tartness to the flavor profile.
Can I bake this in a different pan size?
A 9×13-inch pan is standard and recommended for the correct thickness of the layers. You could divide the batter into two 8×8-inch or 9×9-inch square pans, but you will need to adjust the baking time down significantly and divide the filling and topping evenly between the two dishes.
Why did my pudding not set properly?
The most common reasons for runny instant pudding are using milk that is not cold enough, using an alternative milk (like almond or soy) without reducing the liquid ratio, or accidentally purchasing cook-and-serve pudding mix instead of instant.
What if I do not have a wooden spoon?
If you do not have a wooden spoon with a round handle, you can use the wide end of a chopstick, a thick reusable straw, or even the handle of a thick butter knife to poke the holes. The goal is simply to create wide enough channels for the filling to seep into.
How do I know when the cake is cool enough for the whipped topping?
The baking dish should feel completely cold to the touch when you place your hands on the bottom and sides. If there is any residual warmth, leave it in the refrigerator for another 30 minutes before adding the final layer.
Final Thoughts
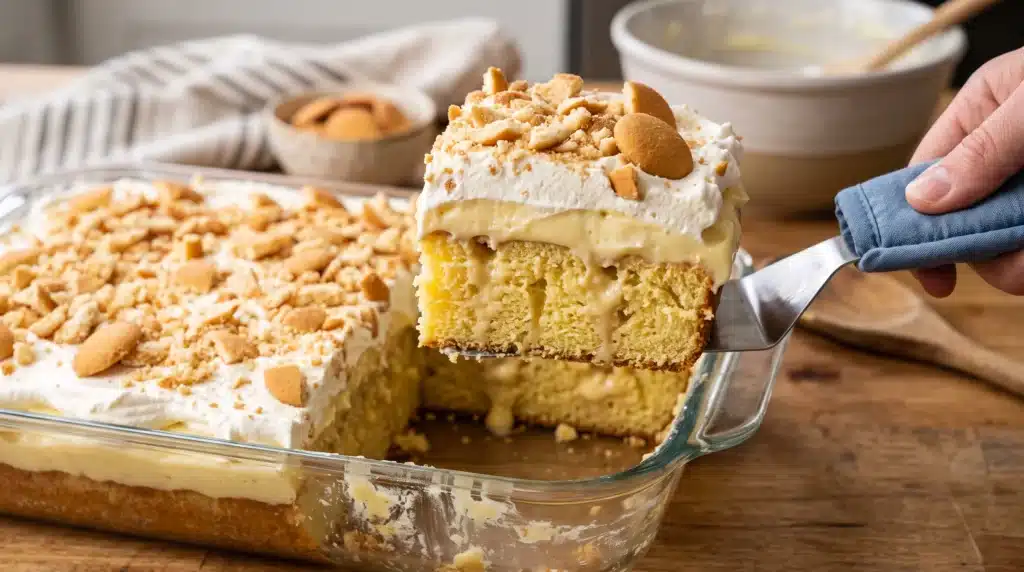
Creating a standout dessert does not have to involve complicated techniques or an entire day spent in the kitchen. By utilizing a few smart shortcuts and understanding how to build flavors and textures, you can easily produce a crowd-pleasing treat that looks and tastes thoughtfully crafted. This banana pudding poke cake offers the comforting, familiar appeal of a classic dessert presented in a fun, easily shareable way. Try preparing it for your next family dinner or weekend gathering, and enjoy the process of bringing these classic flavors together.