
When it comes to nostalgic, crowd-pleasing desserts that require zero oven time, nothing quite compares to a classic Banana Pudding Lush. Combining the comforting flavors of traditional Southern banana pudding with the structured, sliceable layers of a classic “lush” or icebox cake, this dessert delivers maximum flavor with minimal effort. With crisp vanilla wafers that soften into a tender, cake-like base, sweet rounds of fresh bananas, rich vanilla or banana pudding, and a cloud-like blanket of whipped topping, every single bite is pure bliss.
Whether you are preparing for a summer backyard barbecue, a holiday potluck, a Sunday family dinner, or simply craving a sweet treat in the middle of the week, this easy Banana Pudding Lush comes together in just minutes before chilling in the refrigerator to perfection.
What Exactly Is a Banana Pudding Lush?
If you have ever enjoyed a chocolate lasagna, lemon lush, or pineapple dream dessert, you are already familiar with the magic of a “lush.” Unlike traditional bowls of banana pudding that are scooped out trifle-style in messy, free-form portions, a Banana Pudding Lush is thoughtfully layered in a rectangular baking dish so that the cookies, fruit, pudding, and whipped topping meld together as they chill.
As the dish rests in the refrigerator, the moisture from the pudding gently seeps into the Nilla Wafers, transforming them from crunchy cookies into a soft, pastry-like crust that holds its shape when sliced or scooped. Finished with a sprinkle of hand-crushed wafer crumbs or whole cookies right on top, it offers an irresistible contrast of creamy, velvety, and lightly crisp textures.
Why You Will Love This Recipe
- Completely No-Bake: There is no need to turn on the oven or stand over a hot stove making custard from scratch, as the pudding layer comes together effortlessly in a mixing bowl with cold milk.
- Only 5 Simple Ingredients: Everything you need can be picked up in a quick trip to any grocery store—pudding mix, cold whole milk, Nilla Wafers, fresh bananas, and Cool Whip topping.
- Foolproof Assembly: By lining the baking dish in a neat grid of wafers and placing banana slices directly on top, every single serving is guaranteed to have an even ratio of cookie, fruit, and cream.
- The Ultimate Make-Ahead Dessert: Because this dessert needs time to chill so the layers can set and the flavors can meld, it is actually better when made a few hours in advance.
- Kid-Friendly & Great for Helpers: From arranging the wafers in neat rows to crushing cookies over the top at the end, kids love helping assemble this dish.
Ingredients You Will Need
To recreate this luscious layered dessert at home, gather the following staple ingredients:
- Instant Pudding Mix: Two standard boxes (3.4 oz each) or one large family-size box of instant vanilla or banana cream pudding mix provide the rich, golden, silky filling.
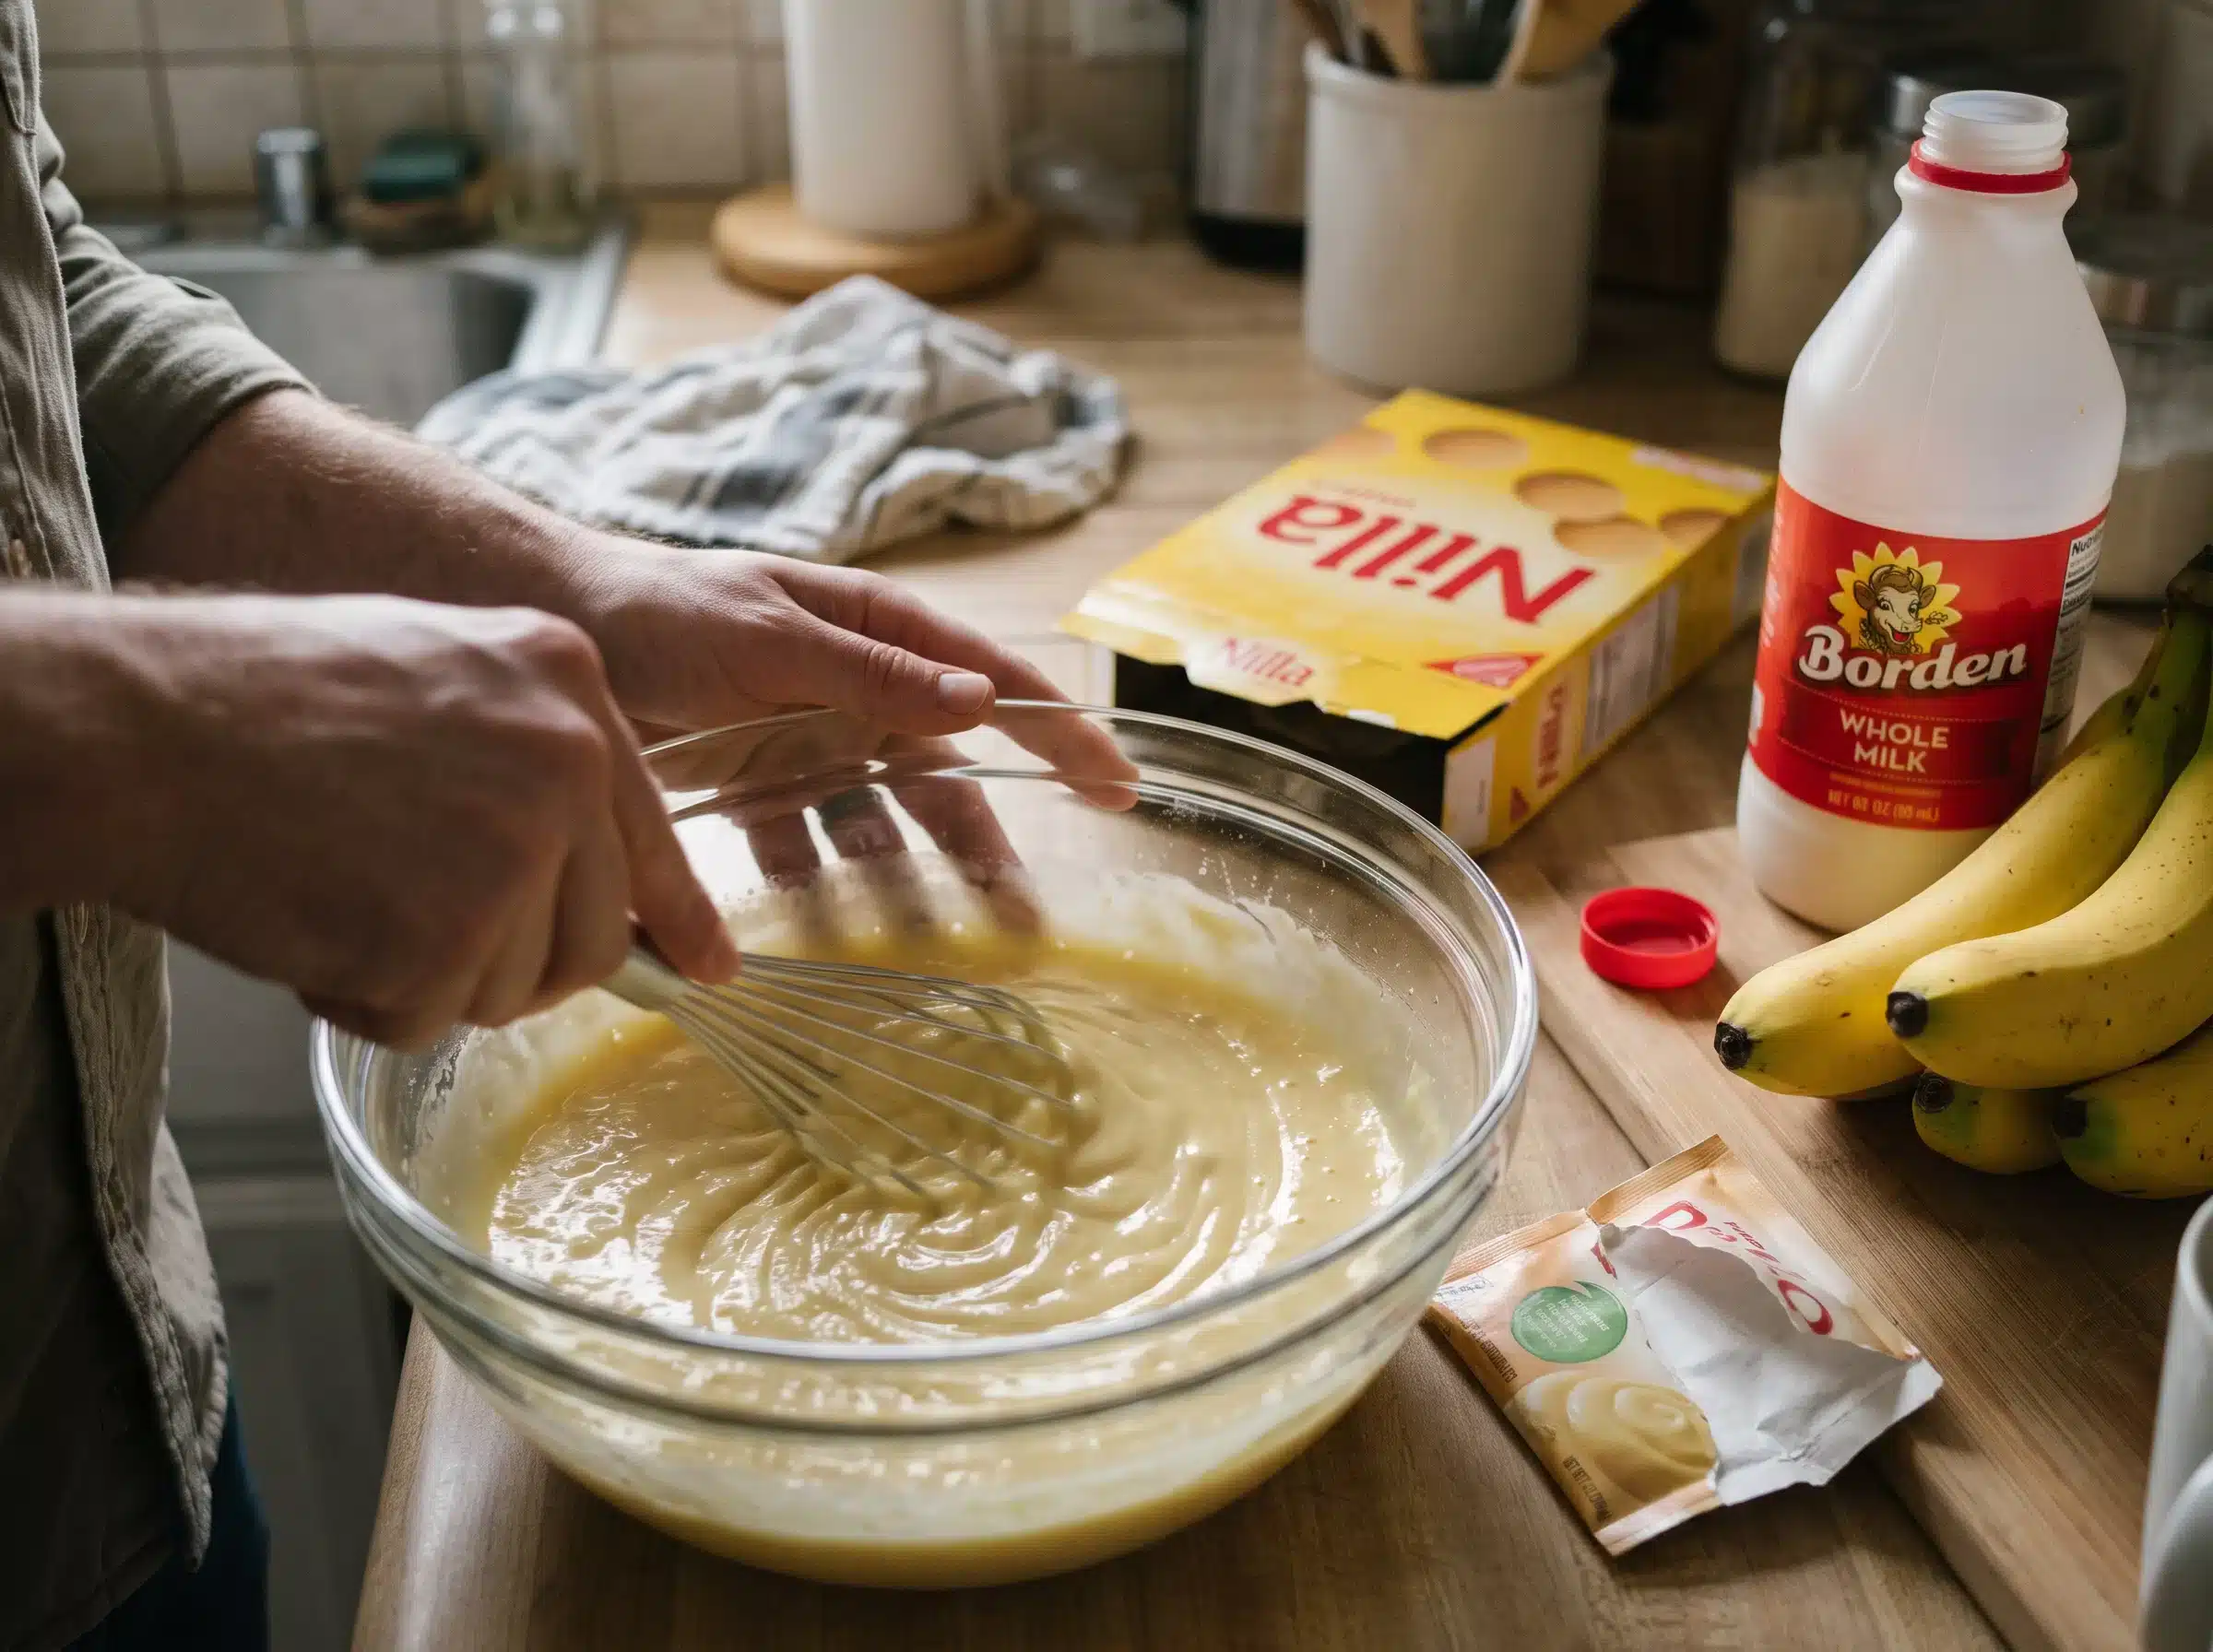
- Cold Whole Milk: About 3 to 4 cups of cold whole milk (such as Borden Whole Milk) are whisked directly with the pudding mix. Using cold whole milk gives the pudding a noticeably richer mouthfeel and helps it set thick and sturdy enough to slice.
- Nilla Wafers: One box of classic Nilla Wafers serves as both the structured base layer (and optional middle layer) and the crunchy crushed garnish on top.
- Fresh Bananas: 3 to 4 medium-to-large fresh bananas, peeled and cut into even coin-sized slices. Look for bananas that are bright yellow and ripe with just a few tiny brown speckles—they should be sweet and fragrant, yet firm enough to hold their shape when sliced.
- Cool Whip Topping: One 8 oz (or 16 oz for an extra-thick layer) tub of thawed whipped topping, spread smoothly over the pudding layer for a light, airy finish.
Step-by-Step Instructions
Step 1: Whisk the Pudding Mix and Cold Milk
Start by pouring your cold whole milk into a large glass mixing bowl and adding the dry instant pudding mix. Using a wire whisk, whisk the mixture vigorously for about 2 minutes. You will see the liquid quickly transform into a glossy, pale-yellow, thick pudding with soft ribbons. Let it sit for a couple of minutes to thicken slightly while you prepare your baking dish.
Step 2: Line the Baking Dish with Wafers
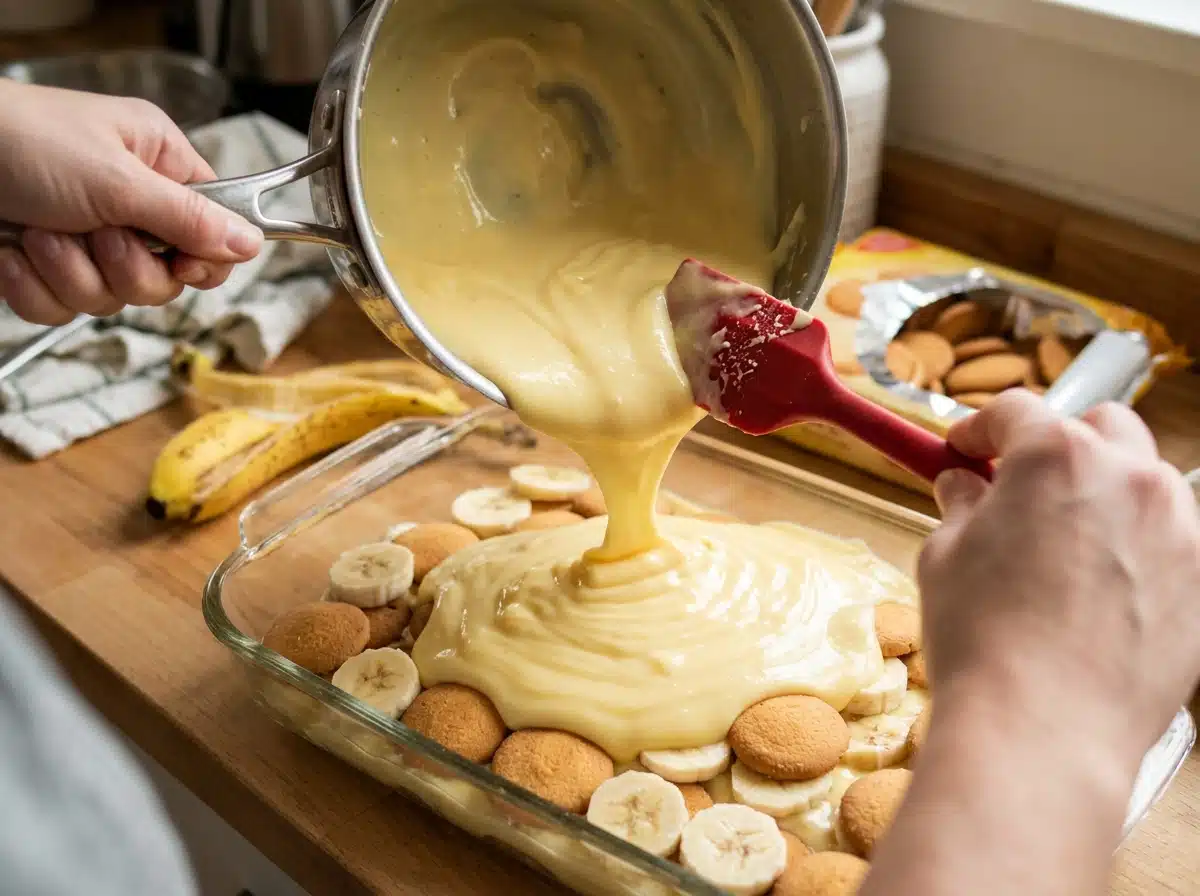
Grab a clean, clear rectangular glass baking dish (an 8×10-inch or 9×11-inch dish works wonderfully). Line the bottom of the dish with Nilla Wafers arranged flat-side down in neat, even rows. Placing 5 wafers across by 6 wafers down creates a tidy 30-cookie grid that covers the base from edge to edge.
Step 3: Add Sliced Fresh Bananas
Peel and slice your fresh bananas into uniform rounds about 1/4-inch to 1/2-inch thick. Place one slice of fresh banana directly on top of each Nilla Wafer in the dish. This structured placement ensures that every bite has a balanced foundation of cookie and banana, while also helping anchor the wafers in place when you pour the pudding on top.
Step 4: Pour and Spread the Pudding Layer
Pour the thickened pudding directly over the banana-topped wafers in the baking dish. Using a silicone spatula, gently spread the pudding into an even layer all the way to the corners of the dish, sealing in the bananas and cookies underneath. (Optional: If you want an extra-tall, double-decker lush, you can add a second layer of Nilla Wafers right on top of the pudding before adding the whipped topping!)
Step 5: Top with Cool Whip
Scoop generous dollops of thawed Cool Whip onto the center of the pudding layer. Using an offset icing spatula or the back of a spoon, spread the whipped topping outward in smooth, swirling strokes until the yellow pudding is completely covered in a snowy white blanket.
Step 6: Garnish, Chill, and Enjoy
Just before serving—or right before chilling—take a handful of Nilla Wafers and crush them by hand directly over the Cool Whip layer to scatter golden cookie crumbs and pieces across the surface. You can also arrange whole Nilla Wafers on top to mark individual portions. Place the dish in the refrigerator to chill until the layers are firm and the wafers have softened, then scoop or slice and enjoy!
Pro Tips for the Best Banana Pudding Lush
- Use Cold Whole Milk for a Thicker Set: Instant pudding relies on cold dairy to activate its thickening agents properly. Whole milk provides the ideal fat content for a creamy, custard-like consistency. Tip: If you want an extra-firm slice, use slightly less milk (about 1/2 cup less than the package directions call for on a standard pudding box) so the pudding sets up extra thick.
- Keep Bananas from Browning: One of the clever benefits of pouring the pudding completely over the banana slices and sealing it with Cool Whip is that it blocks air exposure. Keeping oxygen away from the sliced bananas prevents oxidation, keeping the fruit looking fresh and bright inside the dessert for hours.
- Don’t Skip the Chill Time: While it is tempting to dig right in immediately after garnishing, chilling the assembled dish in the refrigerator for at least 3 to 4 hours is where the magic happens. That resting time allows the dry Nilla Wafers to absorb just enough moisture from the pudding to become tender and easy to cut with a fork.
- Save Some Garnish for Serving: If you plan to chill the dessert overnight, wait to add your crushed Nilla Wafer garnish or fresh banana slices on the plate until right before serving so the cookie crumbs on top stay super crunchy.
Delicious Variations & Customizations
Once you have mastered the classic 5-ingredient Banana Pudding Lush, it is easy to customize the recipe to suit any occasion:
- Cream Cheese Lush Layer: For a tangy, cheesecake-inspired upgrade, beat one 8 oz block of softened cream cheese with 1 cup of powdered sugar and 1 cup of Cool Whip, and spread it over the wafers before adding the bananas and pudding.
- Chessmen Cookie Swap: Swap the top layer of Nilla Wafers for buttery shortbread cookies while keeping classic Nilla Wafers on the bottom.
- Peanut Butter Banana Lush: Drizzle warmed creamy peanut butter over the banana layer before pouring the pudding on top, or crumble peanut butter cups alongside the crushed Nilla Wafers.
- Caramel Banana Foster Lush: Add a swirl of salted caramel sauce over the Cool Whip layer right before sprinkling on the crushed wafer crumbs.
- Homemade Whipped Cream: If you prefer homemade whipped cream over store-bought whipped topping, whip 1.5 cups of cold heavy whipping cream with 1/3 cup of powdered sugar and 1 teaspoon of vanilla extract until stiff peaks form, then spread it over the pudding layer.
Storage and Make-Ahead Instructions
- Making Ahead: You can assemble this Banana Pudding Lush up to 24 hours in advance. Cover the baking dish tightly with plastic wrap or a fitted lid and keep it refrigerated until party time.
- Storing Leftovers: Leftover Banana Pudding Lush can be stored covered in the refrigerator for up to 3 days. Keep in mind that the wafers will continue to soften the longer it sits, and the bananas will gradually release moisture after day two.
- Can You Freeze Banana Pudding Lush? Freezing is not recommended for this recipe because fresh banana slices become mushy and discolored once thawed, and instant pudding can separate when frozen. Enjoy it chilled straight from the fridge instead!
Frequently Asked Questions (FAQs)
Should I use vanilla or banana pudding mix? Either works wonderfully! Many traditionalists prefer instant French vanilla or classic vanilla pudding mix so that the natural flavor of the fresh sliced bananas shines through, while die-hard banana lovers enjoy the extra punch of banana cream pudding mix.
How do I get clean slices when serving? Chill the dessert for at least 4 hours so the pudding and Cool Whip set firmly. Run a sharp knife under warm water, wipe it dry with a paper towel, and cut into neat squares—or use a large metal scoop or spatula to lift portions right onto dessert plates.
Can I double the layers? Absolutely! Depending on the depth of your baking dish, you can easily add a second layer of Nilla Wafers between the pudding and the Cool Whip topping, or garnish the top with whole wafers so every square has double the cookie goodness.
Recipe Card Summary
- Prep Time: 15 minutes
- Chill Time: 3–4 hours
- Total Time: 3 hours 15 minutes
- Servings: 9–12 servings
Ingredients:
- 2 boxes (3.4 oz each) instant vanilla or banana pudding mix
- 3 ½ cups cold whole milk
- 1 box (11 oz or 34 oz family size) Nilla Wafers, divided
- 3 to 4 ripe fresh bananas, sliced into rounds
- 1 tub (8 oz) Cool Whip whipped topping, thawed
Instructions:
- Whisk: In a large glass bowl, whisk together the instant pudding mix and cold whole milk for 2 minutes until smooth, thick, and creamy.
- Layer Wafers: Arrange a single layer of Nilla Wafers in tidy rows across the bottom of a rectangular glass baking dish.
- Add Bananas: Place one slice of fresh banana directly on top of each Nilla Wafer.
- Pour Pudding: Pour the prepared pudding over the banana and wafer layer, smoothing it out evenly with a spatula. (Optional: Add another layer of wafers if desired.)
- Top with Cool Whip: Spread the Cool Whip evenly over the pudding layer using an offset spatula.
- Garnish & Chill: Crush several Nilla Wafers by hand over the top (or garnish with whole wafers and fresh banana slices), chill in the refrigerator until set, and serve cold!

