Let me tell you about one of my absolute favorite treats: Chocolate Apples! I’ll never forget the first time I made them — the smell of melting chocolate wafting through the kitchen was absolutely intoxicating. Since then, I’ve whipped up these beauties countless times, and they’ve become a staple for parties, gifts, and even just a fun afternoon with the kiddos. Trust me, once you try this recipe, you won’t be able to resist making it over and over again. So, get ready to indulge in some sweet nostalgia with these irresistible Chocolate Apples!
Why You’ll Love This Chocolate Apples Recipe
- Easy to Make: This recipe is straightforward, even for beginners. If I can do it, so can you!
- Versatile Flavors: Customize your Chocolate Apples with different toppings to suit every taste. The possibilities are endless!
- Visually Stunning: These Chocolate Apples are not just delicious; they’re a feast for the eyes, making them perfect for celebrations.
- Perfect for Any Occasion: Whether it’s a birthday, holiday, or just a Tuesday, Chocolate Apples add a touch of sweetness to every moment.
- Make Ahead Convenience: You can prepare these in advance, making them a stress-free dessert option for gatherings.
The Secret to Perfect Chocolate Apples
The key to achieving the most decadent Chocolate Apples lies in the chocolate you choose. I recommend using high-quality chocolate bars or melting wafers for a smooth and creamy finish. Here’s a little insider tip: add a teaspoon of vegetable oil to your melted chocolate to give it a glossy sheen and make it easier to coat the apples. This technique will elevate your Chocolate Apples from good to absolutely fantastic! I promise you’ll nail it on your first try.
Rave Reviews from Friends and Followers
“These Chocolate Apples were a hit at my daughter’s birthday party! Everyone loved them, and I can’t believe how easy they were to make.” – Sarah J.
“I made these for a fall gathering, and they disappeared in minutes! I’m already planning to make them again for the holidays.” – Mike R.
“I never thought I could make something so beautiful! My friends were so impressed, and they tasted amazing!” – Emily T.
Creative Variations to Try
- Caramel Drizzle: Drizzle melted caramel over the chocolate for an extra layer of sweetness.
- Nuts Galore: Roll the chocolate-coated apples in chopped nuts for a delightful crunch.
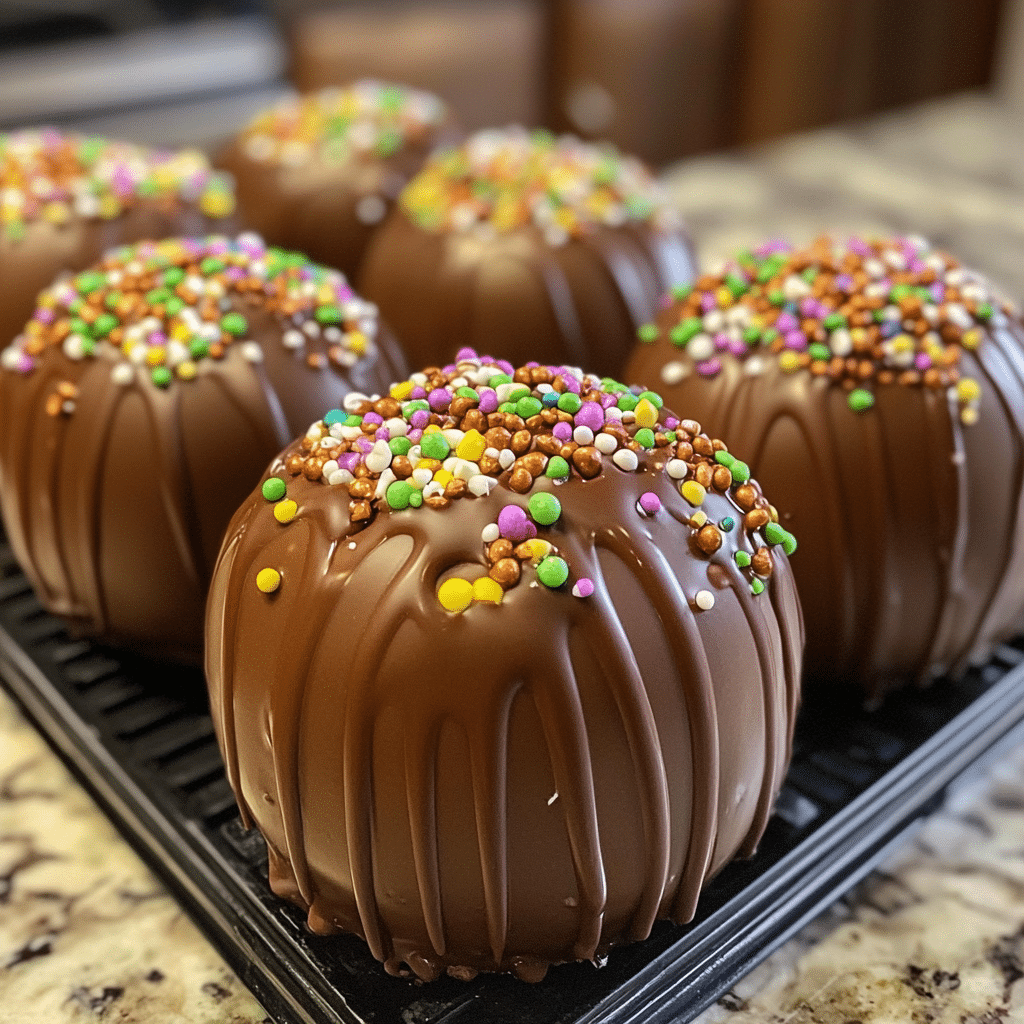
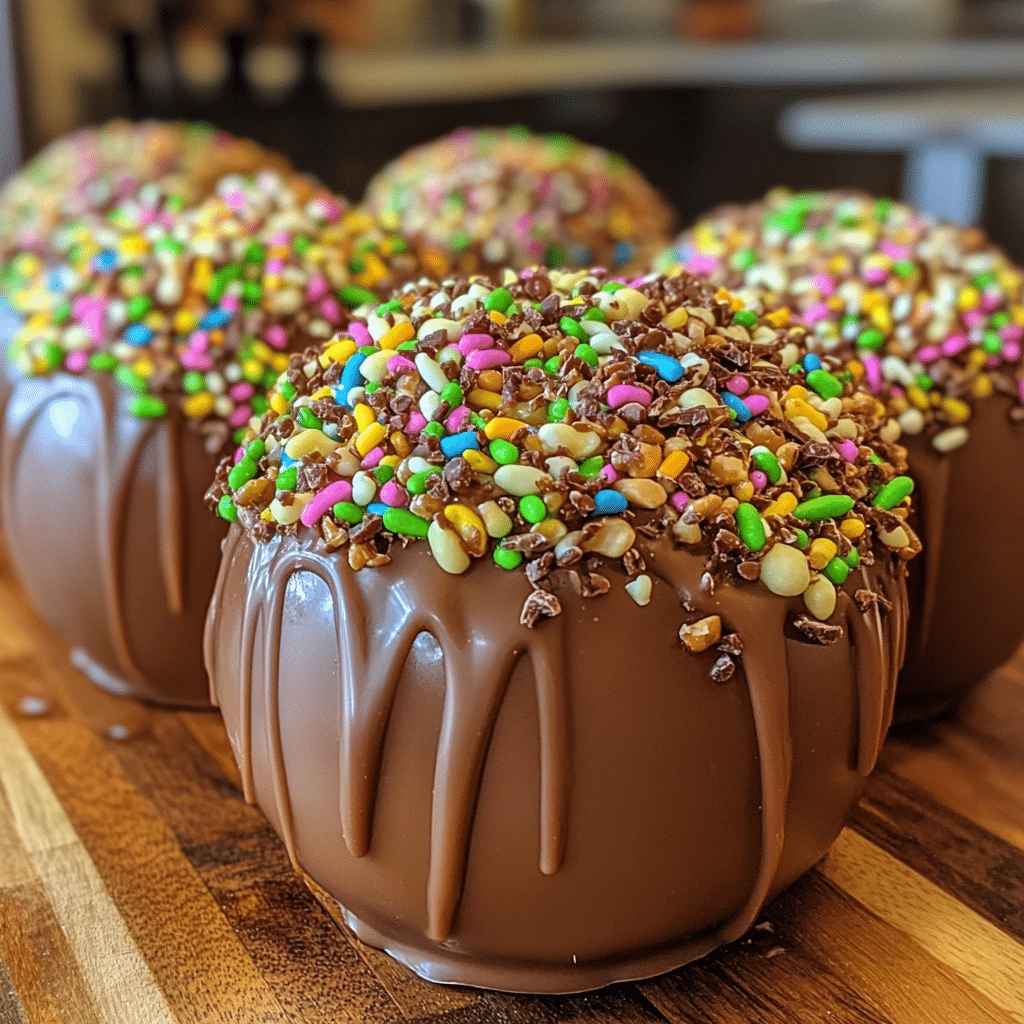
- Sprinkles Fest: Use colorful sprinkles to make these treats festive and fun for any occasion.
- Flavored Chocolates: Experiment with flavored chocolate, like mint or orange, for a unique twist.
Bonus Tip: Don’t be afraid to mix and match toppings! Combining different textures and flavors can create an amazing taste experience.
FAQs – All Your Questions Answered!
How do I store Chocolate Apples? Keep them in an airtight container in the refrigerator. They’ll stay fresh for up to 5 days.
Can I use any type of apple? Absolutely! Granny Smith apples are tart and pair wonderfully with sweet chocolate, but feel free to use your favorite variety.
What if my chocolate seizes up while melting? If this happens, add a little more oil or cream to loosen it up, and stir until smooth.
Can I use white chocolate? Yes! White chocolate adds a lovely sweetness and can be tinted with food coloring for a fun touch.
Storage/Serving Tips
- Store in the refrigerator in an airtight container to keep them fresh.
- Best consumed within 5 days for optimal flavor and texture.
- For serving, place them on a decorative plate to impress your guests.
Perfect Occasions for Chocolate Apples
- Birthday Parties
- Fall Festivals
- Halloween Treats
- Holiday Gatherings
- Movie Nights with Family
- Gifts for Friends
The Complete Recipe
Thank you for sticking with me through all the delicious details! Now, let’s get to the exciting part — the actual recipe for these Chocolate Apples!
Chocolate Apples
Ingredients
- 6 medium-sized apples (Granny Smith or your favorite)
- 12 oz. high-quality chocolate (semi-sweet, dark, or milk)
- 1 tablespoon vegetable oil (optional, for a glossy finish)
- Your choice of toppings (crushed nuts, sprinkles, coconut flakes, etc.)
Tip: Make sure to wash and dry the apples thoroughly before dipping. Any moisture can affect the chocolate coating.
Extend ingredients section: Consider adding some sea salt on top for a sweet and salty combination, or experiment with flavored extracts like peppermint or orange to infuse the chocolate with unique tastes!
Step-by-Step Instructions
Step 1: Prepare Your Apples
Begin by washing the apples under cool water, ensuring they’re free from any wax or residue. Pat them dry with a clean towel. This step is crucial, as any moisture will prevent the chocolate from adhering properly. Insert a stick into the top of each apple, making it easy to dip and enjoy.
Step 2: Melt the Chocolate
In a microwave-safe bowl, combine the chocolate and vegetable oil. Heat it in 30-second intervals, stirring in between until it’s completely melted and smooth. This should take about 1-2 minutes. Be careful not to overheat the chocolate, as it can seize up!
Step 3: Dip the Apples
Once your chocolate is melted, it’s time for the fun part! Hold each apple by the stick and dip it into the chocolate, swirling it around to ensure it’s fully coated. Allow any excess chocolate to drip off before placing the apple on a parchment-lined baking sheet. Repeat with all the apples.
Step 4: Add Toppings
While the chocolate is still wet, sprinkle your chosen toppings over the apples. This is where you can really get creative! If you’re using nuts or sprinkles, make sure to do this quickly so the chocolate sets and the toppings stick nicely.
Step 5: Let Them Set
Place the baking sheet in the refrigerator for about 30 minutes, or until the chocolate is firm. This step is essential for achieving that perfect bite when it’s time to enjoy your Chocolate Apples.
Nutrition Info: Each Chocolate Apple has approximately 250 calories, depending on the type of chocolate and toppings used. Enjoy in moderation as a delightful treat!
Extend instructions: If you want to make your Chocolate Apples extra special, consider drizzling some contrasting chocolate (like white chocolate over dark chocolate) after the first layer has set. It adds a beautiful touch and makes for stunning presentation!
Final Thoughts
There you have it! Chocolate Apples are not just a treat; they’re a delightful experience that brings back sweet memories and creates new ones. I can’t encourage you enough to try this recipe — it’s a game-changer! Whether you’re making them for yourself or sharing them with loved ones, these Chocolate Apples are sure to impress. Get in the kitchen and start melting that chocolate; you’re going to love every bite!