Oh my goodness, are you ready for a culinary adventure that will leave your taste buds dancing? I’ve made these Air Fryer Beef Kebabs more times than I can count, and they are always a hit! Trust me, once you discover how to create these juicy, smoky-flavored kebabs with crispy edges right in your air fryer, you’ll be hooked. This recipe has turned into a family favorite, and I can’t wait to share the magic with you!
Why You’ll Love This Air Fryer Beef Kebabs
- Quick and Easy: Perfect for busy weeknights when you need dinner on the table fast.
- Flavor Explosion: Infused with smoky flavor that rivals those cooked on a grill.
- Visual Appeal: These colorful kebabs are as beautiful as they are delicious, making them perfect for dinner parties.
- Versatile: Customize with your favorite vegetables or spices to suit your taste.
- Make-Ahead Convenience: Prep them in advance for an effortless meal later.
The Secret to Perfect Air Fryer Beef Kebabs
Now, let’s talk about the secret to making these Air Fryer Beef Kebabs truly outstanding. The magic ingredient? Marinade! A great marinade not only tenderizes the meat but also infuses it with incredible flavor. Trust me, letting the beef soak in a flavorful blend of spices, oil, and acidity (like lemon juice or vinegar) is a total game-changer. Aim for at least 30 minutes, but if you can let it marinate overnight, your kebabs will be bursting with flavor!
Another insider tip? Don’t overcrowd the air fryer basket. Give those kebabs space to breathe, and they’ll develop that coveted crispy exterior that we all crave.
Rave Reviews from Friends and Followers
“These kebabs are the highlight of our dinner table! The smoky flavor is insane!” – Sarah T.
“I never knew I could make kebabs this perfect at home. My family devoured them!” – Mike R.
“A must-try recipe! They’re so juicy and flavorful. I can’t get enough!” – Lisa K.
Creative Variations to Try
- Spicy Chipotle: Add chipotle seasoning for a kick of heat.
- Greek Inspired: Use oregano, lemon juice, and feta cheese for a Mediterranean twist.
- Teriyaki Glaze: Brush with teriyaki sauce before air frying for an Asian flavor profile.
- Herb & Garlic: Mix chopped fresh herbs and garlic into the marinade for a fragrant explosion.
Bonus: Try skewering some veggies like bell peppers and onions alongside the beef for a complete meal on a stick!
FAQs – All Your Questions Answered!
- Can I use chicken instead of beef? Absolutely! Just adjust the cooking time as chicken cooks faster than beef.
- How do I store leftovers? Place them in an airtight container and refrigerate for up to 3 days.
- Can I freeze these kebabs? Yes! Freeze before cooking for up to 2 months. Thaw in the fridge before air frying.
- What if my kebabs are dry? Make sure you’re not overcooking them. Use a meat thermometer to ensure they reach 145°F for medium doneness.
Storage/Serving Tips
- Store leftovers in an airtight container in the fridge for up to 3 days.
- For longer storage, freeze uncooked kebabs and cook directly from frozen.
- Serve these kebabs with a side of tzatziki or your favorite dipping sauce for an extra flavor boost!
Perfect Occasions for Air Fryer Beef Kebabs
- Family dinners on busy weeknights.
- Weekend barbecues when you want that grilled flavor without the hassle.
- Game day gatherings that need a crowd-pleaser.
- Picnics or potlucks where you want to impress with minimal effort.
- Meal prep for quick lunches throughout the week.
The Complete Recipe
Thank you for sticking with me! Now, let’s dive into the recipe for these amazing Air Fryer Beef Kebabs.
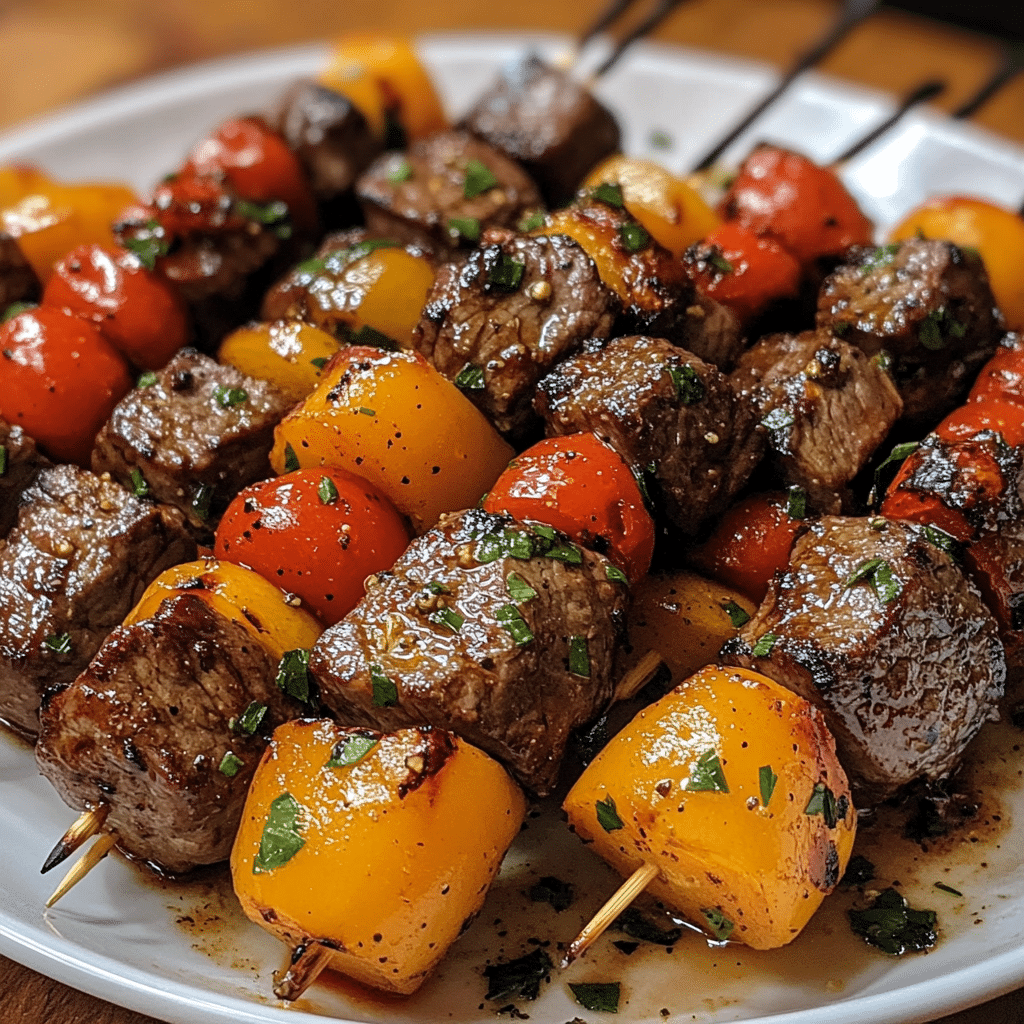
Air Fryer Beef Kebabs
Ingredients
- 1 pound beef sirloin, cut into 1-inch cubes
- 1/4 cup olive oil
- 3 tablespoons soy sauce
- 2 tablespoons apple cider vinegar
- 2 tablespoons Worcestershire sauce
- 2 cloves garlic, minced
- 1 teaspoon smoked paprika
- 1 teaspoon onion powder
- 1 teaspoon black pepper
- 1 teaspoon salt
- Skewers (soaked in water if wooden)
Tip: Feel free to add vegetables like cherry tomatoes, bell peppers, or zucchini to your skewers for a colorful and nutritious addition!
Step-by-Step Instructions
Step 1: Prepare the Marinade
In a large bowl, combine olive oil, soy sauce, apple cider vinegar, Worcestershire sauce, minced garlic, smoked paprika, onion powder, black pepper, and salt. Whisk until well mixed. This marinade is the heart and soul of your kebabs, so don’t rush this step!
Step 2: Marinate the Beef
Add the cubed beef sirloin to the marinade, ensuring all pieces are well-coated. Cover and let it marinate in the refrigerator for at least 30 minutes, or ideally overnight. The longer, the better!
Step 3: Prepare the Skewers
If using wooden skewers, make sure to soak them in water for at least 30 minutes to prevent burning. Thread the marinated beef onto the skewers, leaving a little space between each piece for even cooking.
Step 4: Preheat the Air Fryer
Preheat your air fryer to 400°F (200°C) for about 5 minutes. This step is crucial for achieving that crispy exterior we all love!
Step 5: Air Fry the Kebabs
Place the skewers in the air fryer basket in a single layer, ensuring they aren’t overcrowded. Cook for 8-10 minutes, turning halfway through, until the beef is cooked to your desired doneness.
Step 6: Serve and Enjoy!
Once cooked, let the kebabs rest for a few minutes before serving. This allows the juices to redistribute, making them even juicier! Serve with your favorite dipping sauce and enjoy the compliments from your friends and family.
Nutrition info: Each kebab is packed with protein and essential nutrients, making them a healthy choice for any meal.
Final Thoughts
Wow, can you believe how easy it is to create these delectable Air Fryer Beef Kebabs? They are not only a feast for the eyes but a delight for the taste buds. I truly believe this recipe is special because it combines simplicity with incredible flavor. I encourage you to try it for yourself — I promise you won’t be disappointed. Happy cooking!