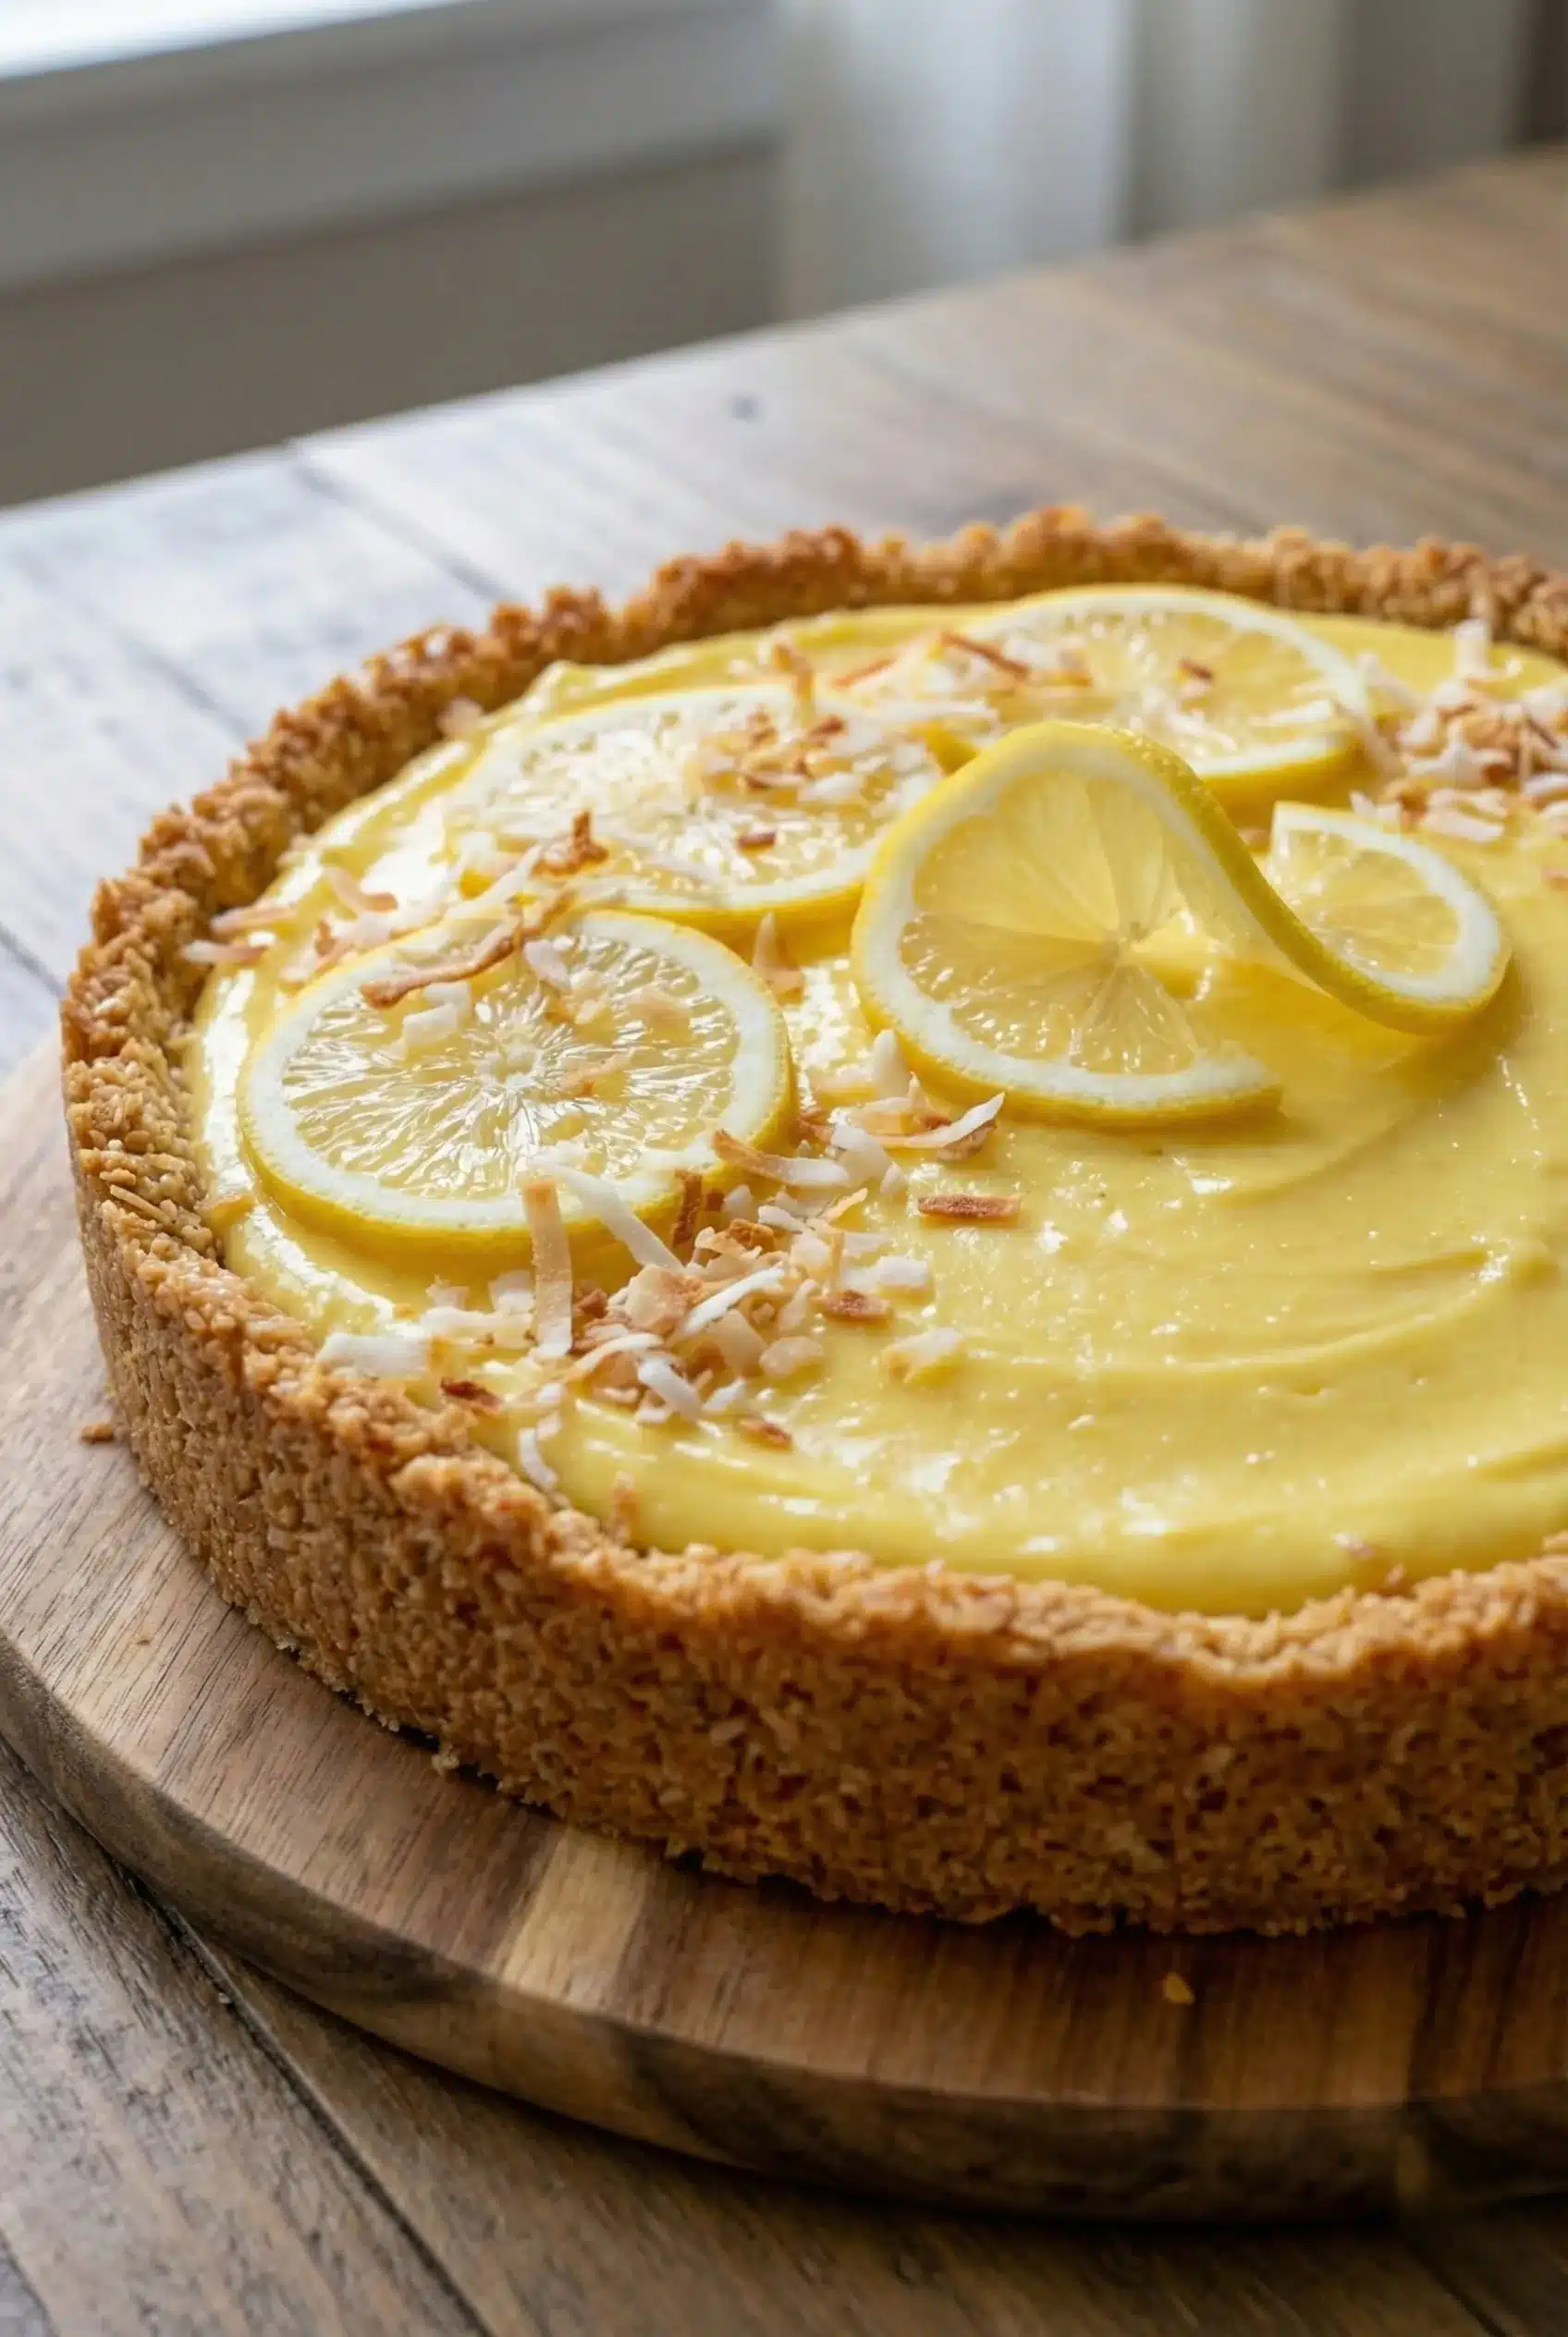
Let me tell you about my all-time favorite dessert: the No Bake Lemon Icebox Pie. I can’t even count how many times I’ve whipped this up, but every single time it disappears faster than I can say “refreshing treat!” This pie is a showstopper at summer gatherings, and trust me, it’s incredibly easy to make. Just the thought of that creamy, tangy filling nestled in a zesty coconut crust makes my mouth water. If you’re looking for a dessert that’s both delightful and simple, you’re in for a treat!
Why You’ll Love This No Bake Lemon Icebox Pie
- Effortless Preparation: No baking required! Just mix, chill, and serve.
- Refreshing Flavor: The tangy lemon and sweet cream combination is perfect for hot days.
- Versatile Dessert: Great for any occasion, from casual family dinners to elegant summer parties.
- Make-Ahead Convenience: Prepare it a day in advance and free up your time for other fun activities.
- Visually Stunning: The vibrant lemon filling and crust create an eye-catching dessert that impresses everyone.
The Secret to Perfect No Bake Lemon Icebox Pie
The key to a perfect No Bake Lemon Icebox Pie is using fresh lemon juice and high-quality sweetened condensed milk. Trust me on this one! The freshness of the lemons brightens the flavor, while the creamy milk balances it out beautifully. When I first started making this pie, I learned that letting it chill for the right amount of time is crucial. This allows the flavors to meld and the pie to set perfectly. So, don’t rush it—let it chill and develop those amazing flavors!
Rave Reviews from Friends and Followers
“This pie is a game-changer! I made it for a family gathering, and everyone was raving about it. I could barely get a slice for myself!” – Sarah M.
“I was blown away by how simple it was to make, and the flavor is out of this world! Definitely a new summer favorite.” – John D.
“I’ve been searching for an easy dessert recipe, and this one is perfection! So refreshing and delicious!” – Emily R.
Creative Variations to Try
- Key Lime Twist: Substitute lime juice for lemon juice for a zesty variation.
- Berry Bliss: Top with fresh berries or swirl berry puree into the filling for added flavor and color.
- Chocolate Lovers: Add melted chocolate to the filling for a decadent twist.
- Coconut Dream: Mix shredded coconut into the filling or use coconut cream for a tropical vibe.
Bonus: Consider adding a layer of whipped cream on top for extra creaminess and decoration!
FAQs – All Your Questions Answered!
Can I use bottled lemon juice? While fresh lemon juice is preferred for the best flavor, bottled juice can work in a pinch.
How long can I store the pie? The pie can be stored in the refrigerator for up to 5 days, but it’s best enjoyed within the first 2-3 days for optimal freshness.
Can I freeze this pie? Yes! You can freeze it for up to a month. Just make sure to cover it well with plastic wrap.
What can I substitute for sweetened condensed milk? You can make your own by simmering milk and sugar until thickened, or use a dairy-free version if needed.
Storage/Serving Tips
- Store any leftovers in an airtight container in the fridge.
- For optimal freshness, cover the pie with plastic wrap or foil to prevent any odors from affecting the flavor.
- Garnish with lemon slices or whipped cream just before serving for an extra pop of color and taste.
Perfect Occasions for No Bake Lemon Icebox Pie
- Summer BBQs and picnics
- Birthday parties and celebrations
- Family reunions and gatherings
- Potlucks and brunches
- Holiday celebrations like the Fourth of July or Memorial Day
The Complete Recipe
Thanks for sticking with me! I can’t wait for you to try this recipe. Let’s dive into the delicious details.
No Bake Lemon Icebox Pie
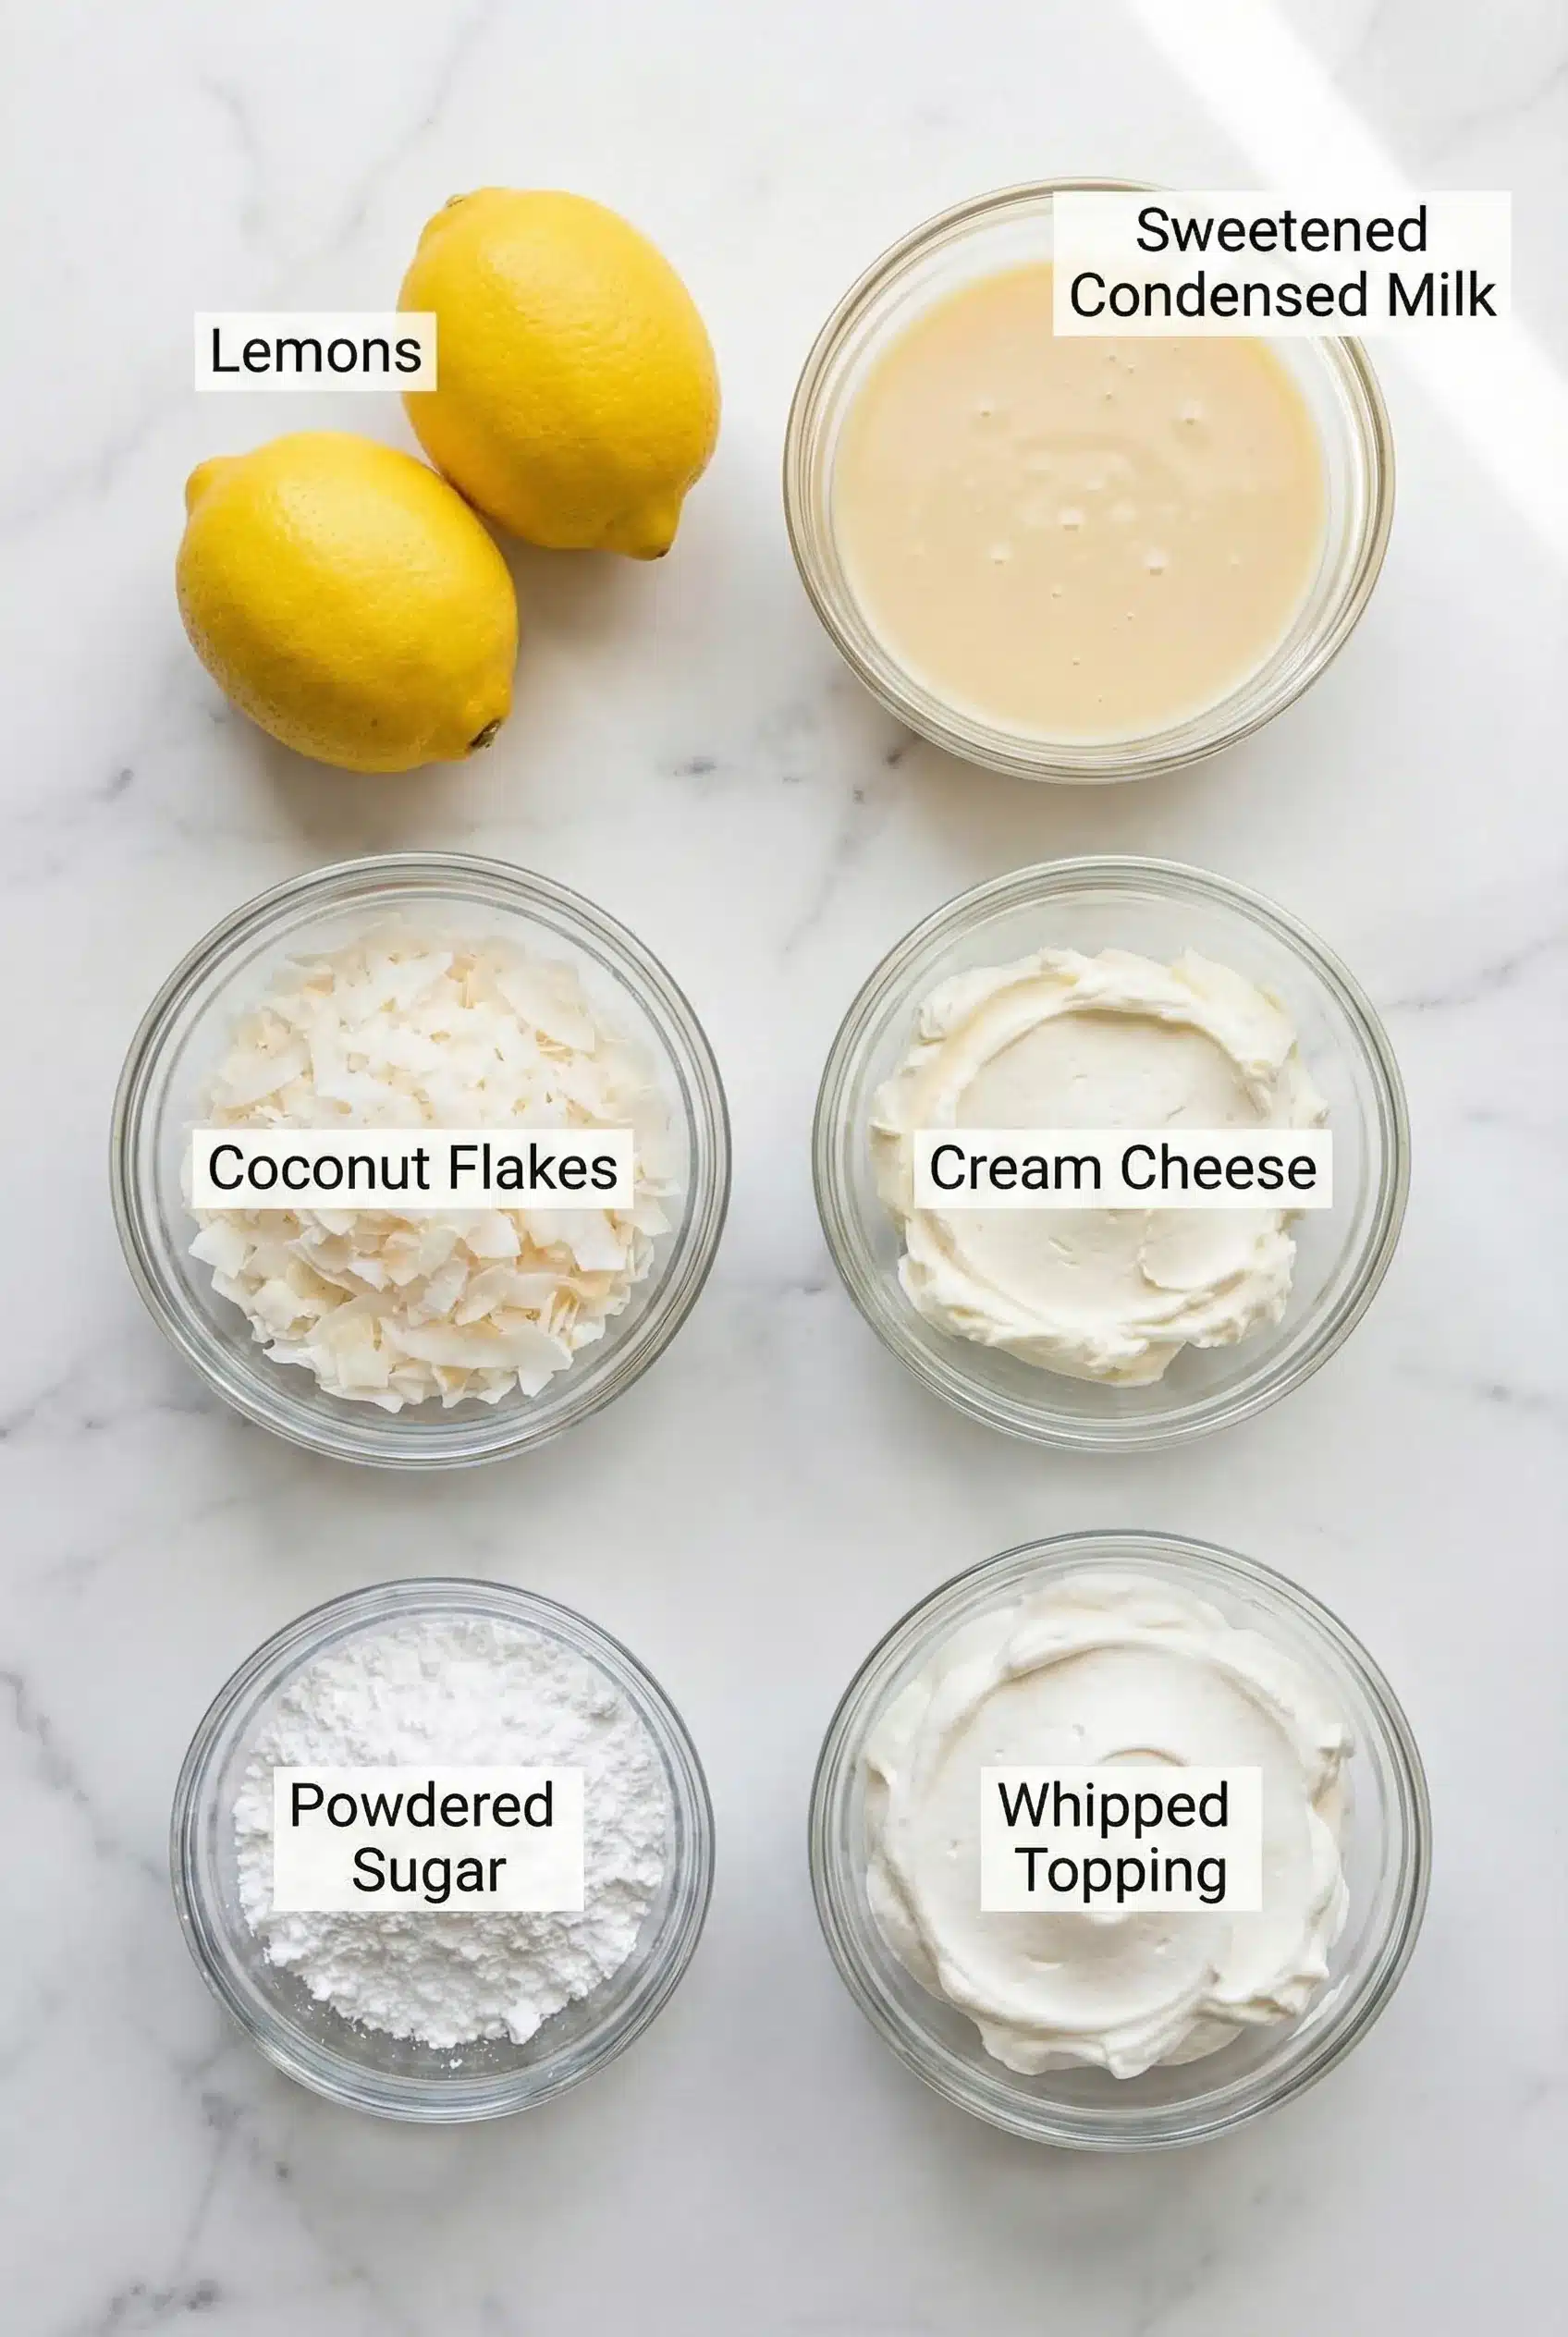
Ingredients
- 1 ½ cups graham cracker crumbs
- ½ cup unsweetened shredded coconut
- ½ cup unsalted butter, melted
- 1 can (14 oz) sweetened condensed milk
- ½ cup fresh lemon juice
- 1 tablespoon lemon zest
- 1 cup heavy whipping cream
- ¼ cup powdered sugar
Tip: For an extra zesty flavor, consider adding a bit more lemon zest to the filling! It really enhances the citrusy notes.
Extend ingredients section: You can use gluten-free graham crackers for a gluten-free version, or substitute the coconut with finely crushed nuts for a different flavor profile. Each ingredient plays a crucial role in creating that creamy texture and delightful taste!
Step-by-Step Instructions
Step 1: Prepare the Crust
In a mixing bowl, combine the graham cracker crumbs, shredded coconut, and melted butter. Mix until well combined. Press this mixture firmly into the bottom and up the sides of a 9-inch pie pan. This will create a sturdy base that holds all that creamy filling!
Step 2: Make the Filling
In another bowl, whisk together the sweetened condensed milk, fresh lemon juice, and lemon zest until smooth. This is where the magic happens—the combination of these ingredients creates a luscious filling that you won’t be able to resist!
Step 3: Whip the Cream
In a separate bowl, use an electric mixer to whip the heavy cream and powdered sugar until stiff peaks form. This light and airy whipped cream adds a beautiful texture to the pie. Gently fold the whipped cream into the lemon mixture until fully combined. This step is crucial because it gives the pie that dreamy, creamy consistency!
Step 4: Assemble the Pie
Pour the lemon filling into the prepared graham cracker crust, smoothing the top with a spatula. Cover the pie with plastic wrap and refrigerate for at least 4 hours or overnight for best results. Letting it chill allows the flavors to meld beautifully and ensures it sets perfectly.
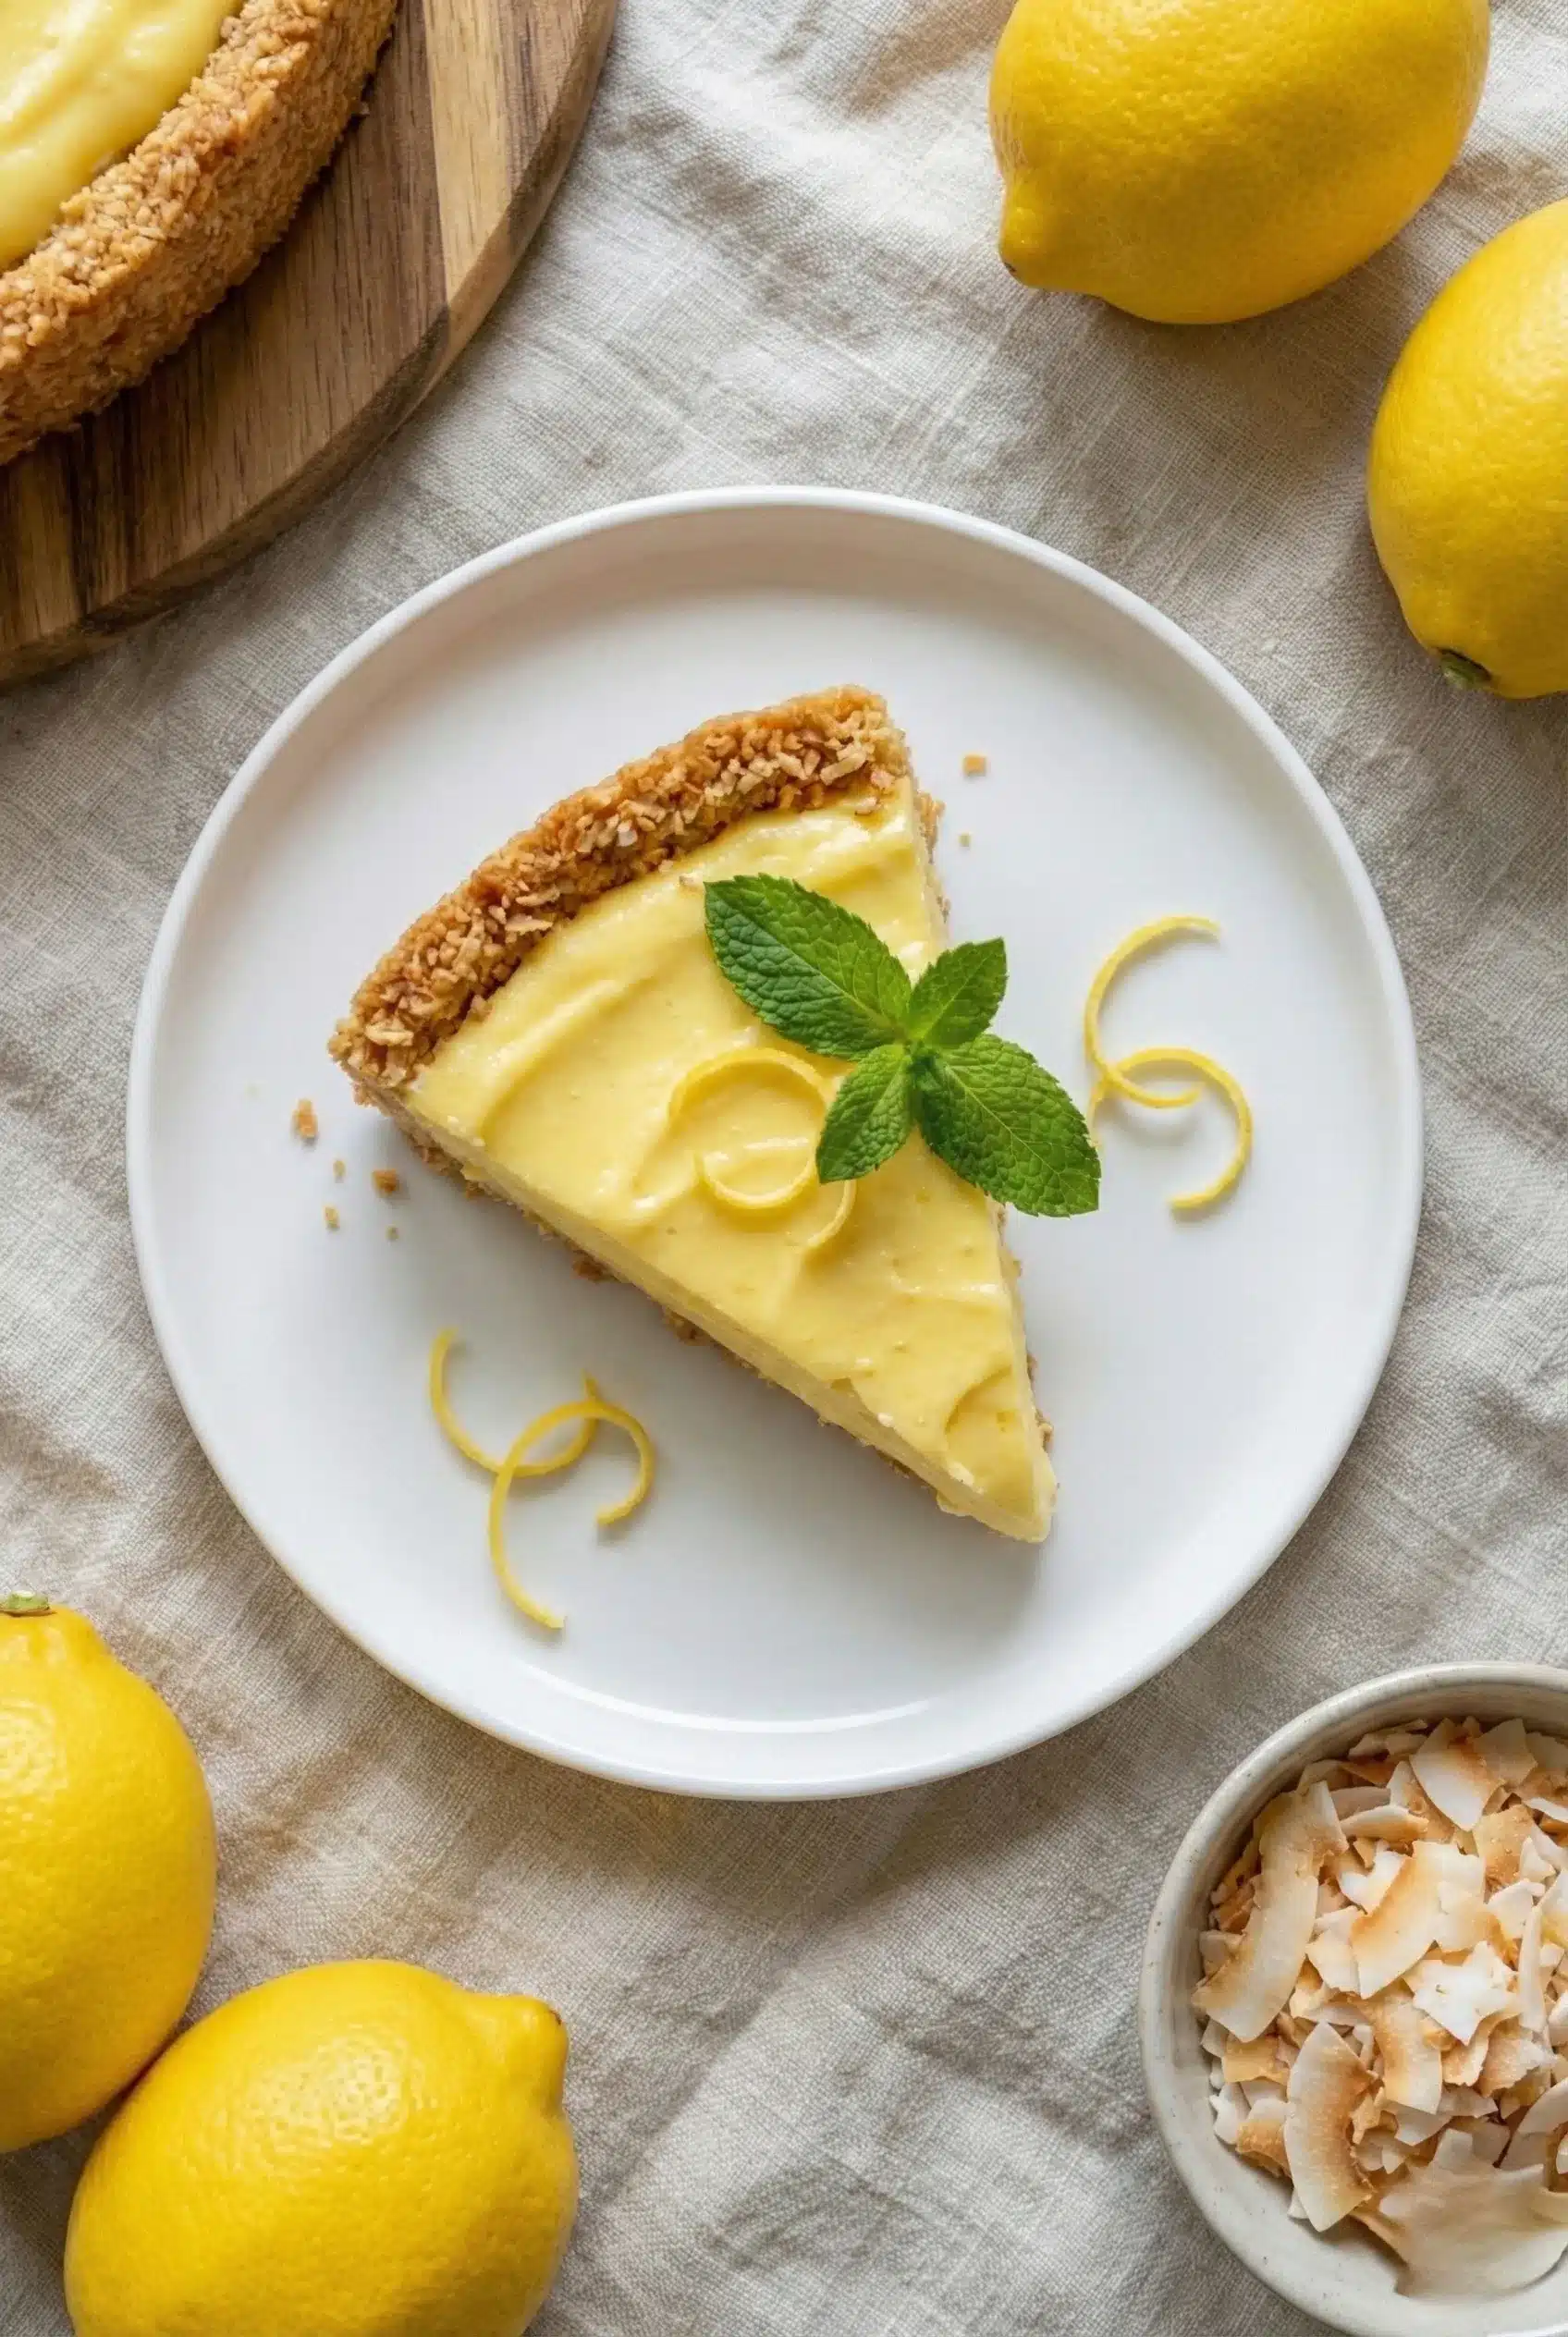
Step 5: Serve and Enjoy
When ready to serve, slice the pie and garnish with additional whipped cream or lemon slices if desired. Trust me, the first bite will make you a believer in the power of no bake desserts!
Nutrition Info: One slice of this pie is approximately 250 calories, so it’s a treat that won’t break the calorie bank—perfect for those warm summer days!
Final Thoughts
This No Bake Lemon Icebox Pie is more than just a dessert; it’s a celebration of flavors and memories. Each bite is a reminder of sunny days and joyful gatherings. I truly hope you give this recipe a try. It’s a surefire way to impress your friends and family, and I guarantee you’ll be asked for the recipe again and again. Happy baking (or should I say, chilling)!
No Bake Lemon Icebox Pie
-
Total Time:
4 hr 20 mins -
Yield:
8 servings
Enjoy a refreshing No Bake Lemon Icebox Pie with a zesty coconut crust—perfect for warm days or easy summer gatherings.
Ingredients
- • 1 ½ cups graham cracker crumbs
- • ½ cup unsweetened shredded coconut
- • ½ cup unsalted butter, melted
- • 1 can (14 oz) sweetened condensed milk
- • ½ cup fresh lemon juice
- • 1 tablespoon lemon zest
- • 1 cup heavy whipping cream
- • ¼ cup powdered sugar
Instructions
- Prepare the Crust: In a mixing bowl, combine the graham cracker crumbs, shredded coconut, and melted butter. Mix until well combined. Press this mixture firmly into the bottom and up the sides of a 9-inch pie pan.
- Make the Filling: In another bowl, whisk together the sweetened condensed milk, fresh lemon juice, and lemon zest until smooth.
- Whip the Cream: In a separate bowl, use an electric mixer to whip the heavy cream and powdered sugar until stiff peaks form. Gently fold the whipped cream into the lemon mixture until fully combined.
- Assemble the Pie: Pour the lemon filling into the prepared graham cracker crust, smoothing the top with a spatula. Cover the pie with plastic wrap and refrigerate for at least 4 hours or overnight.
- Serve and Enjoy: When ready to serve, slice the pie and garnish with additional whipped cream or lemon slices if desired.
Notes
Storage: Store leftovers in an airtight container in the fridge for up to 3 days.
- Prep Time: 20 mins
- Cook Time: 0 mins
- Category: Dessert
- Cuisine: American
- Method: Oven