I can hardly contain my excitement as I tell you about one of my all-time favorite Halloween treats: Witch Finger Cookies! I first made these delightfully spooky cookies a few years ago for a Halloween party, and let me tell you, they were an absolute hit! My friends and family couldn’t stop raving about them, and I’ve made them every Halloween since. These cookies are not only fun to make, but they also add an incredible wow factor to any spooky celebration. Trust me, once you try these, you’ll be enchanted by their eerie yet adorable appearance and delicious almond flavor!
Why You’ll Love This Witch Finger Cookies
- Easy to Make: The process is straightforward, making it perfect for bakers of all skill levels!
- Versatile Decoration: You can get creative with the decorations to make them as spooky or cute as you like.
- Delicious Flavor: The almond flavor is a game-changer, giving these cookies a unique twist that everyone will love.
- Visually Striking: Their creepy appearance is sure to impress your guests and add excitement to your Halloween spread.
- Make-Ahead Convenience: You can prepare them in advance, so you’ll have more time to enjoy the festivities!
The Secret to Perfect Witch Finger Cookies
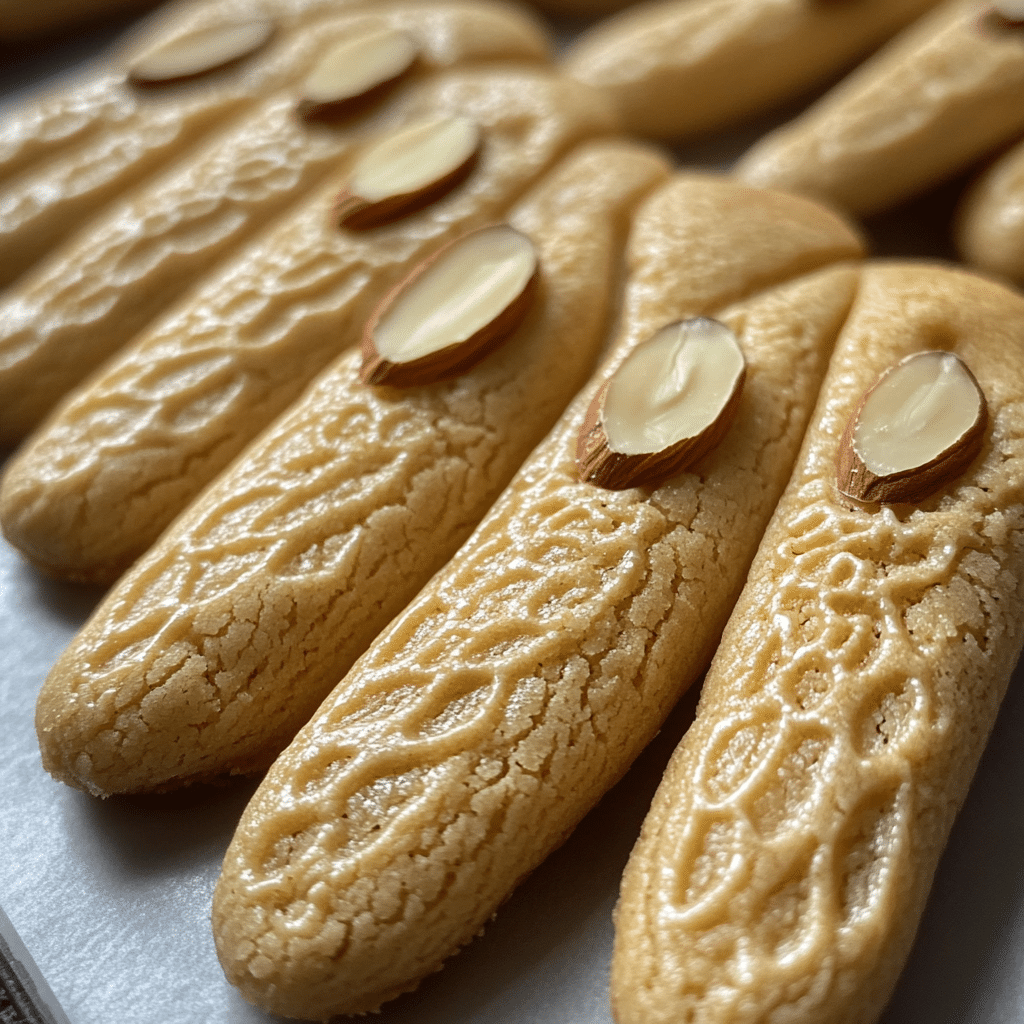
The secret to these incredible Witch Finger Cookies lies in the almond paste and the way you shape them. The almond paste not only enhances the flavor but also gives the cookies that perfect chewy texture. When shaping the cookies, make sure to taper the ends to create that finger-like appearance. Don’t forget to press sliced almonds at the tips to simulate creepy fingernails! And here’s a pro tip: chilling the dough for about 30 minutes before baking allows the flavors to meld beautifully and helps them hold their shape.
Rave Reviews from Friends and Followers
“These Witch Finger Cookies were the highlight of our Halloween party! Everyone loved the almond flavor, and they looked so cool!” – Sarah L.
“I made these for my kids’ class party, and they were a total hit! The kids were excited to eat ‘witch fingers’!” – Mark T.
“I’ve baked a lot of cookies, but these are definitely my favorite. They are easy to make and so much fun to decorate!” – Jenna R.
Creative Variations to Try
- Chocolate-Dipped Tips: Dip the almond tips in melted chocolate for an extra indulgent twist.
- Green Food Coloring: Add a few drops of green food coloring to the dough for a ghoulish touch.
- Spiced Variation: Incorporate cinnamon or nutmeg into the dough for a warm, spiced flavor.
- Nut-Free Version: Use sunflower seeds instead of almonds for a nut-free treat that still looks fantastic.
Bonus: If you want to make these cookies even more festive, consider adding edible glitter to the dough for a magical sparkle!
FAQs – All Your Questions Answered!
Can I make these cookies ahead of time? Absolutely! These cookies can be baked a few days in advance and stored in an airtight container.
What can I substitute for almond paste? If you have nut allergies, you can use a non-nut alternative like sunflower seed paste or omit it entirely and use vanilla extract for flavor.
How should I store leftover cookies? Store them in an airtight container at room temperature for up to a week. For longer freshness, refrigerate them.
Can I freeze Witch Finger Cookies? Yes! You can freeze the baked cookies for up to three months. Just make sure to wrap them tightly.
Storage/Serving Tips
- Keep cookies in an airtight container at room temperature for up to a week.
- For longer storage, refrigerate or freeze them. They freeze well for up to three months!
- Consider serving them on a spooky platter with some fake cobwebs for a fun Halloween touch.
Perfect Occasions for Witch Finger Cookies
- Halloween parties and gatherings
- Classroom Halloween celebrations
- Haunted house events
- Fall-themed potlucks
- Spooky movie nights with friends
- Trick-or-treaters who deserve a special treat
The Complete Recipe
Thank you for your enthusiasm about these Witch Finger Cookies. I can’t wait for you to give them a try! Here’s the complete recipe:
Witch Finger Cookies

Ingredients
- 1 cup unsalted butter, softened
- 1 cup granulated sugar
- 1 cup almond paste
- 2 large eggs
- 1 teaspoon vanilla extract
- 3 cups all-purpose flour
- 1 teaspoon baking powder
- 1/2 teaspoon salt
- Sliced almonds (for fingernails)
- Green or red gel food coloring (optional)
Tip: If you want to make the cookies extra special, try adding a teaspoon of almond extract for a more pronounced flavor!
Step-by-Step Instructions
Step 1: Cream the Butter and Sugar
In a large mixing bowl, cream together the softened butter and granulated sugar until light and fluffy, about 3-5 minutes. This step is crucial as it incorporates air, resulting in a lighter cookie texture.
Step 2: Add the Almond Paste
Mix in the almond paste until well combined. It should blend smoothly with the butter and sugar, adding that delicious flavor you’ll love.
Step 3: Incorporate the Eggs and Vanilla
Add the eggs one at a time, mixing well after each addition. Then stir in the vanilla extract. This will enhance the overall flavor profile of your cookies.
Step 4: Combine Dry Ingredients
In a separate bowl, whisk together the flour, baking powder, and salt. Gradually add this mixture to the wet ingredients, mixing until just combined. Be careful not to over mix as it can lead to tough cookies!
Step 5: Chill the Dough
Cover the dough in plastic wrap and refrigerate for at least 30 minutes. This helps the cookies maintain their shape while baking and allows the flavors to develop.
Step 6: Shape the Cookies
Preheat your oven to 350°F (175°C). Take out the dough and shape it into finger-like shapes, tapering the ends. Press a sliced almond into the tip of each cookie to create the fingernail. Place them on a baking sheet lined with parchment paper.
Step 7: Bake
Bake in the preheated oven for 12-15 minutes or until the edges are lightly golden. Keep an eye on them as baking times may vary!
Step 8: Cool and Enjoy
Let the cookies cool on the baking sheet for a few minutes before transferring them to a wire rack to cool completely. Enjoy your spooky treats, and watch as everyone marvels at your baking skills!
Nutrition information per cookie: approximately 120 calories, 6g fat, 15g carbs, and 1g protein.
Final Thoughts
So there you have it, my delightful recipe for Witch Finger Cookies! They’re spooky, delicious, and fun to make — a perfect addition to your Halloween festivities. I encourage you to give this recipe a try; I promise it will become a beloved tradition in your home just like it has in mine. Let’s make this Halloween one to remember with these enchanting cookies that will leave